Lexipt User Manual
1. Introduction
Welcome to Lexipt, a translation platform designed for professional translation projects with integrated Quality Assurance (QA) and team collaboration features. Lexipt consists of two core components:
- Lexipt Client: Your primary desktop application for translating, proofreading, and managing projects.
- Lexipt Collaboration Server: An optional LAN server that allows multiple users to collaborate on a project in real time.
This manual will primarily focus on the installation and usage of the Lexipt Client.
2. Installation & Launch
This chapter will guide you through the installation process of Lexipt Client on a Windows system.
2.1. System Requirements
- Operating System: Windows 10 or later (64-bit)
- Disk Space: At least 2 GB of free space is recommended for the application itself, runtime caches, and future updates.
- Dependencies: Some features of Lexipt require Git. For the best experience, it is recommended that you pre-install Git for Windows and ensure it is available in your system's PATH environment variable. The installer may bundle Git in some cases, but pre-installing ensures all features work correctly.
2.2. Obtaining the Installer
You can download the latest Lexipt-Client-vX.Y.Z-windows-x64-Setup.exe installer from the project's community website or release page.
2.3. Installation Steps
Running the installer will guide you through a series of setup steps.
Step 1: Run the Installer
Double-click the downloaded .exe installation file to launch the setup wizard. You may see a User Account Control (UAC) prompt — select "Yes" to continue.
Step 2: Welcome Screen
The first page of the wizard is the welcome screen. It displays the product name and a brief description. Note that if an older version of Lexipt is currently running on your system, it is recommended to close it manually before clicking Next to ensure a clean upgrade.
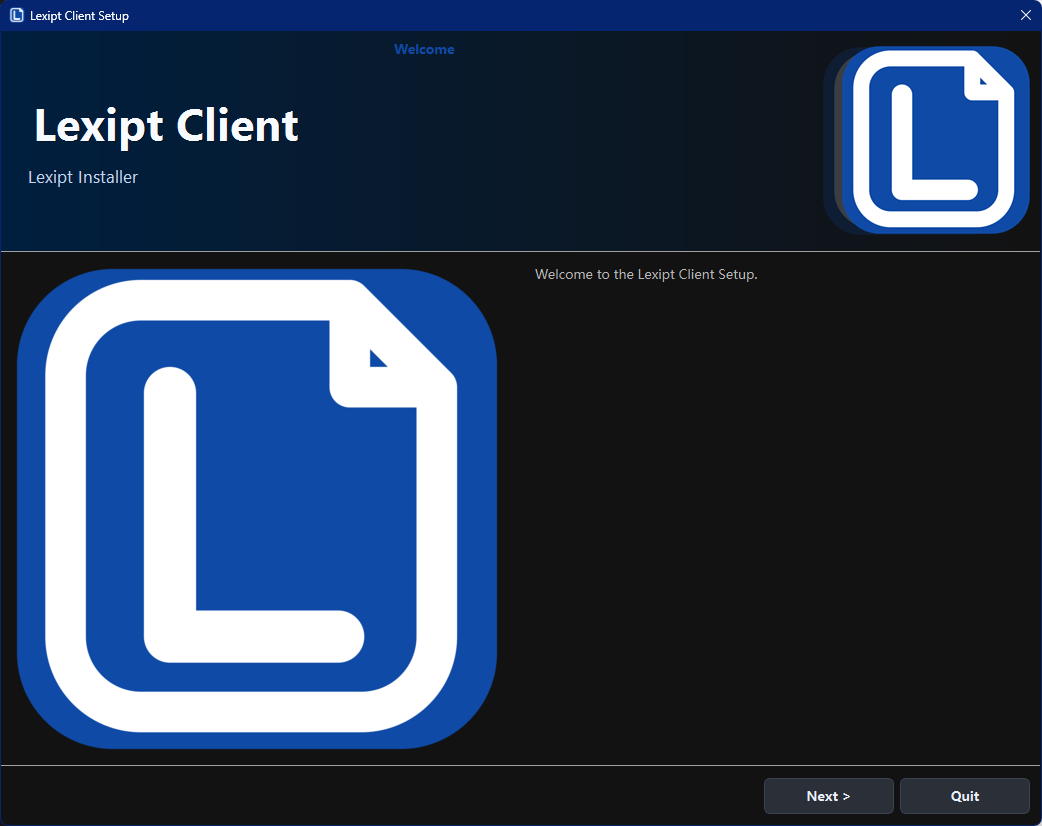
Click Next to continue.
Step 3: Choose Installation Directory
On this page, you can specify the installation location for Lexipt Client.
- The default path is typically
C:\Users\<YourUsername>\LexiptClient. - You can click the Browse... button to select a different folder.
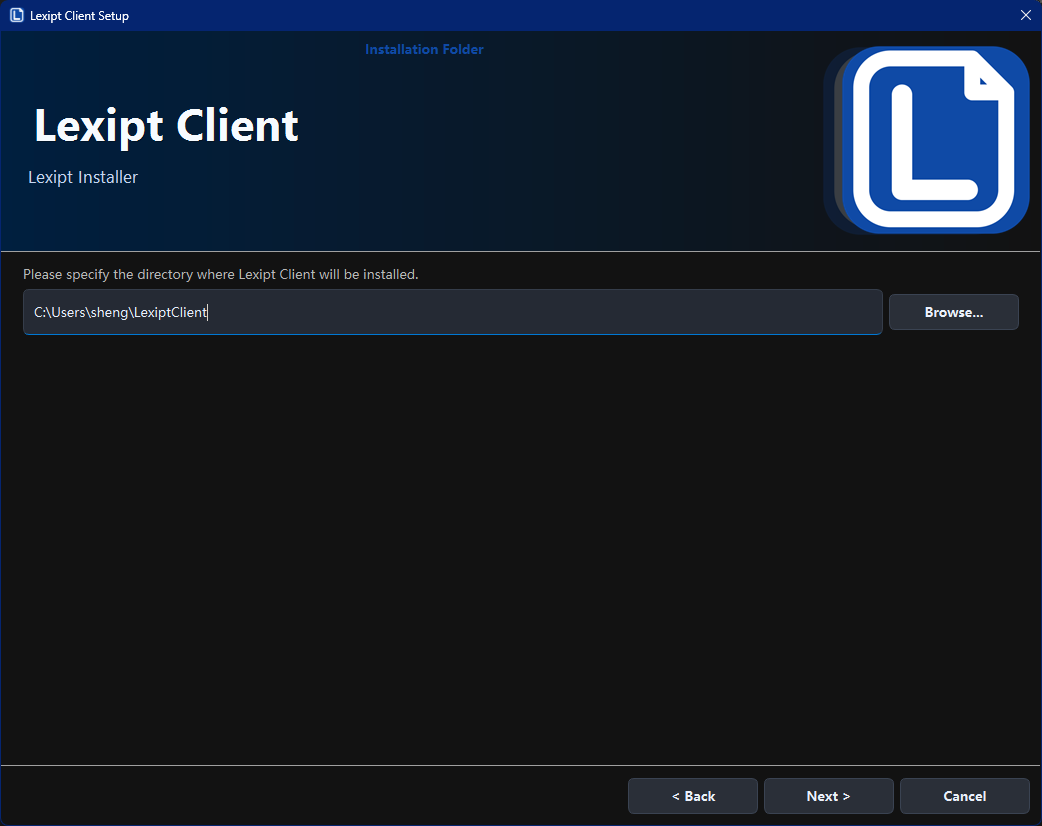
Note: If the installer detects an older version of Lexipt in the selected or default directory, it may display a dialog asking whether you want to run the old version's uninstaller first. If this prompt appears, we strongly recommend selecting "Yes", completing the uninstall, and then re-running the installer.
After choosing the path, click Next to continue.
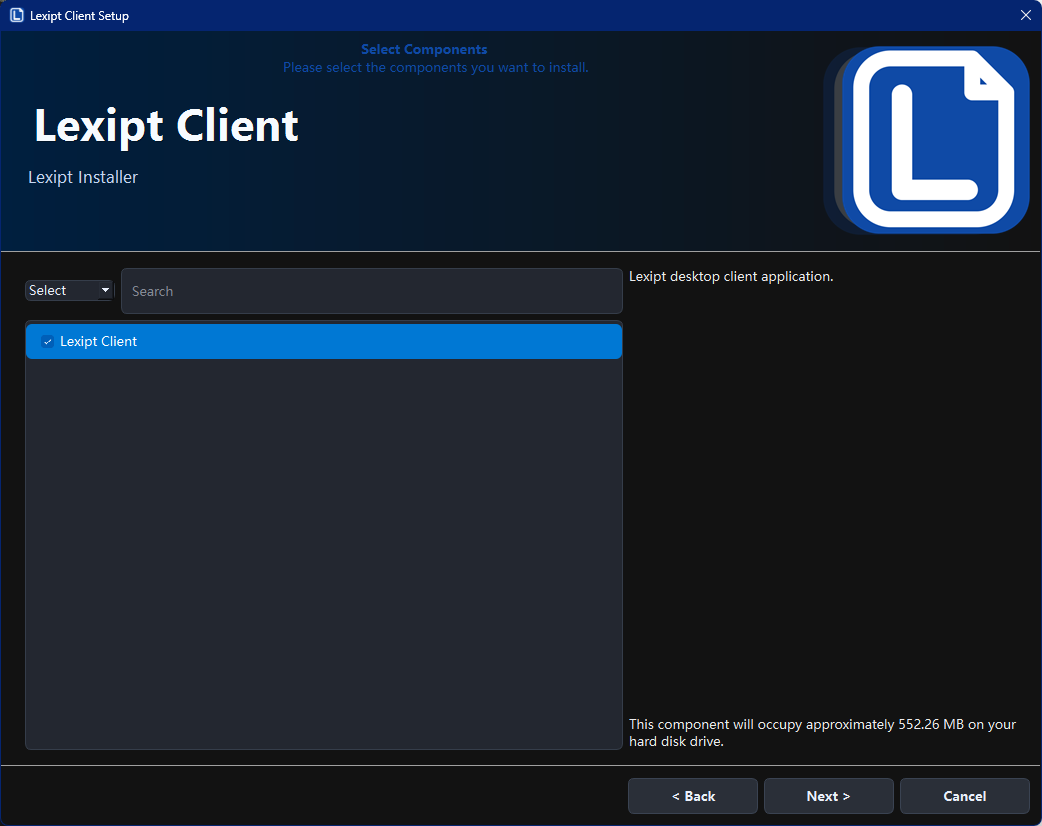
Step 4: Ready to Install & Finish
The wizard will display a summary of the installation settings. Click Install to begin copying files. The installation may take a few minutes.
After the installation is complete, you will see the final "Finish" page.
On this page, make sure the Run Lexipt Client now checkbox is selected, then click Finish. The setup wizard will close and the Lexipt Client will launch automatically.
2.4. Launching the Application
If you did not choose to auto-launch at the end of installation, you can start the application in the following ways:
- Desktop Shortcut: The installer typically creates a shortcut named "Lexipt Client" on your desktop.
- Start Menu: Find the "Lexipt" folder in the Start Menu and click "Lexipt Client".
On first launch, you will see the main application interface.
Next, we will explore how to begin your first translation project.
3. Quick Start: Your First Translation Project
This chapter walks you through a complete mini-workflow — from creating a project from scratch, translating content, to exporting the final translation.
3.1. Creating a New Project
First, we need a project to manage our translation files.
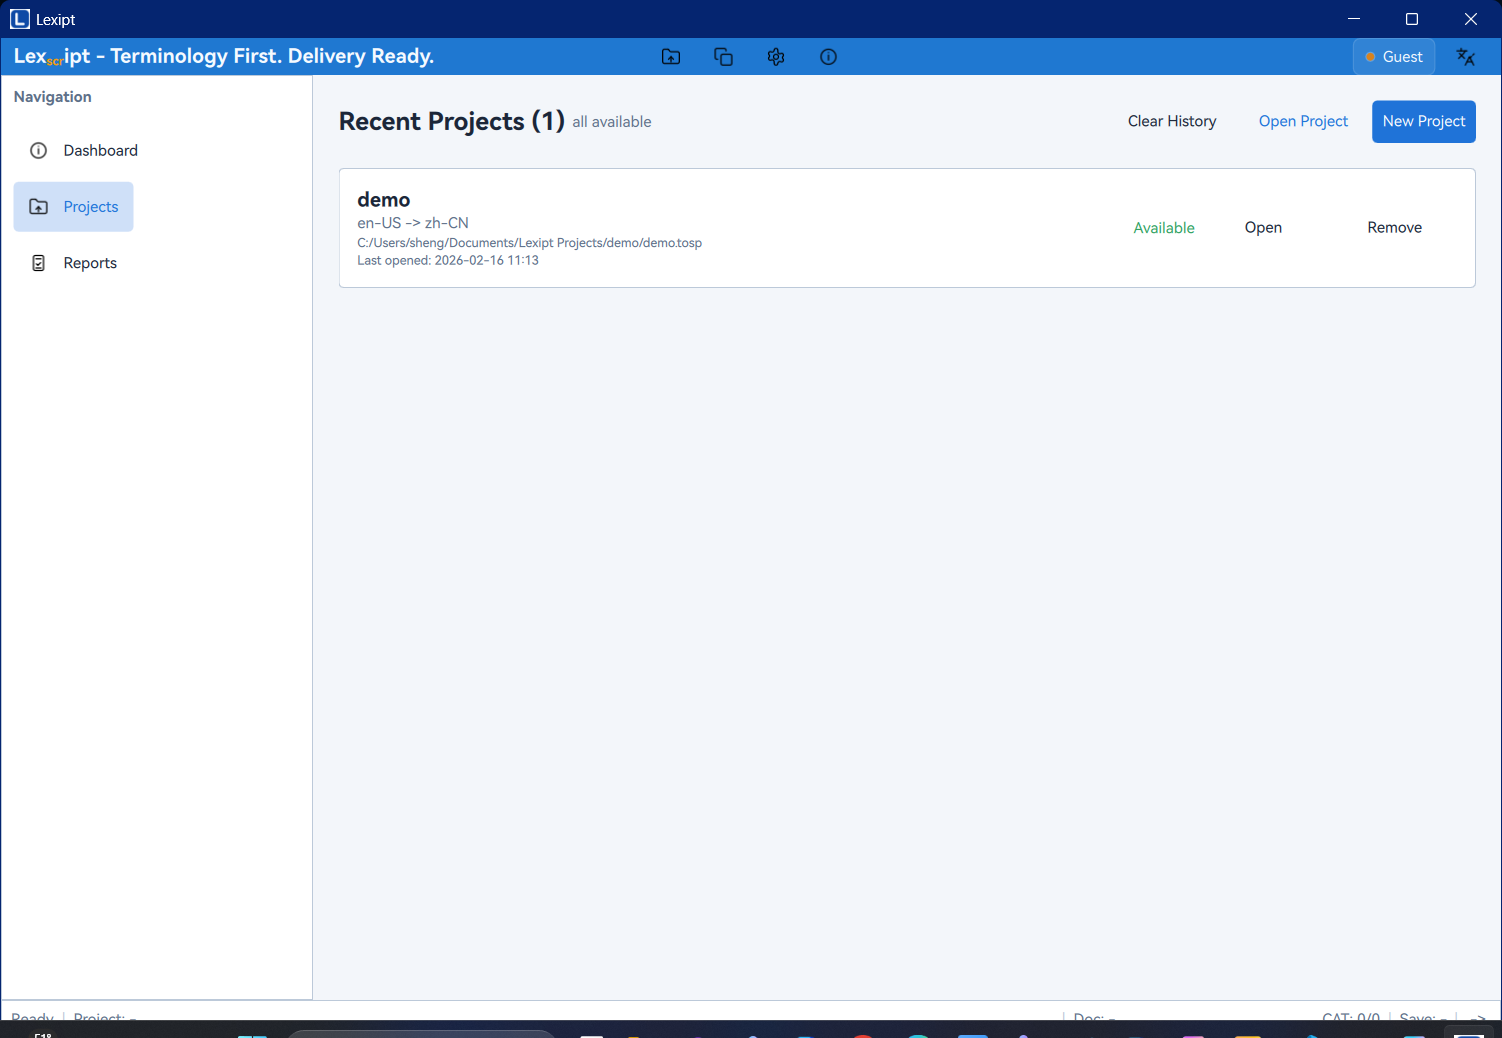
- In the left navigation bar, click the Projects icon to go to the project management page.
- Click the New Project button in the upper-right corner of the page.
- In the Create New Project dialog that appears, fill in the following information:
- Project Name: Give your project a meaningful name, e.g.,
MyFirstTranslation. - Location: Click the
...button to choose a folder for storing the project files. - Source Language: Select the original language of the document to be translated, e.g.,
English (US). - Target Language: Select the language to translate into, e.g.,
Chinese (Simplified).
- Project Name: Give your project a meaningful name, e.g.,
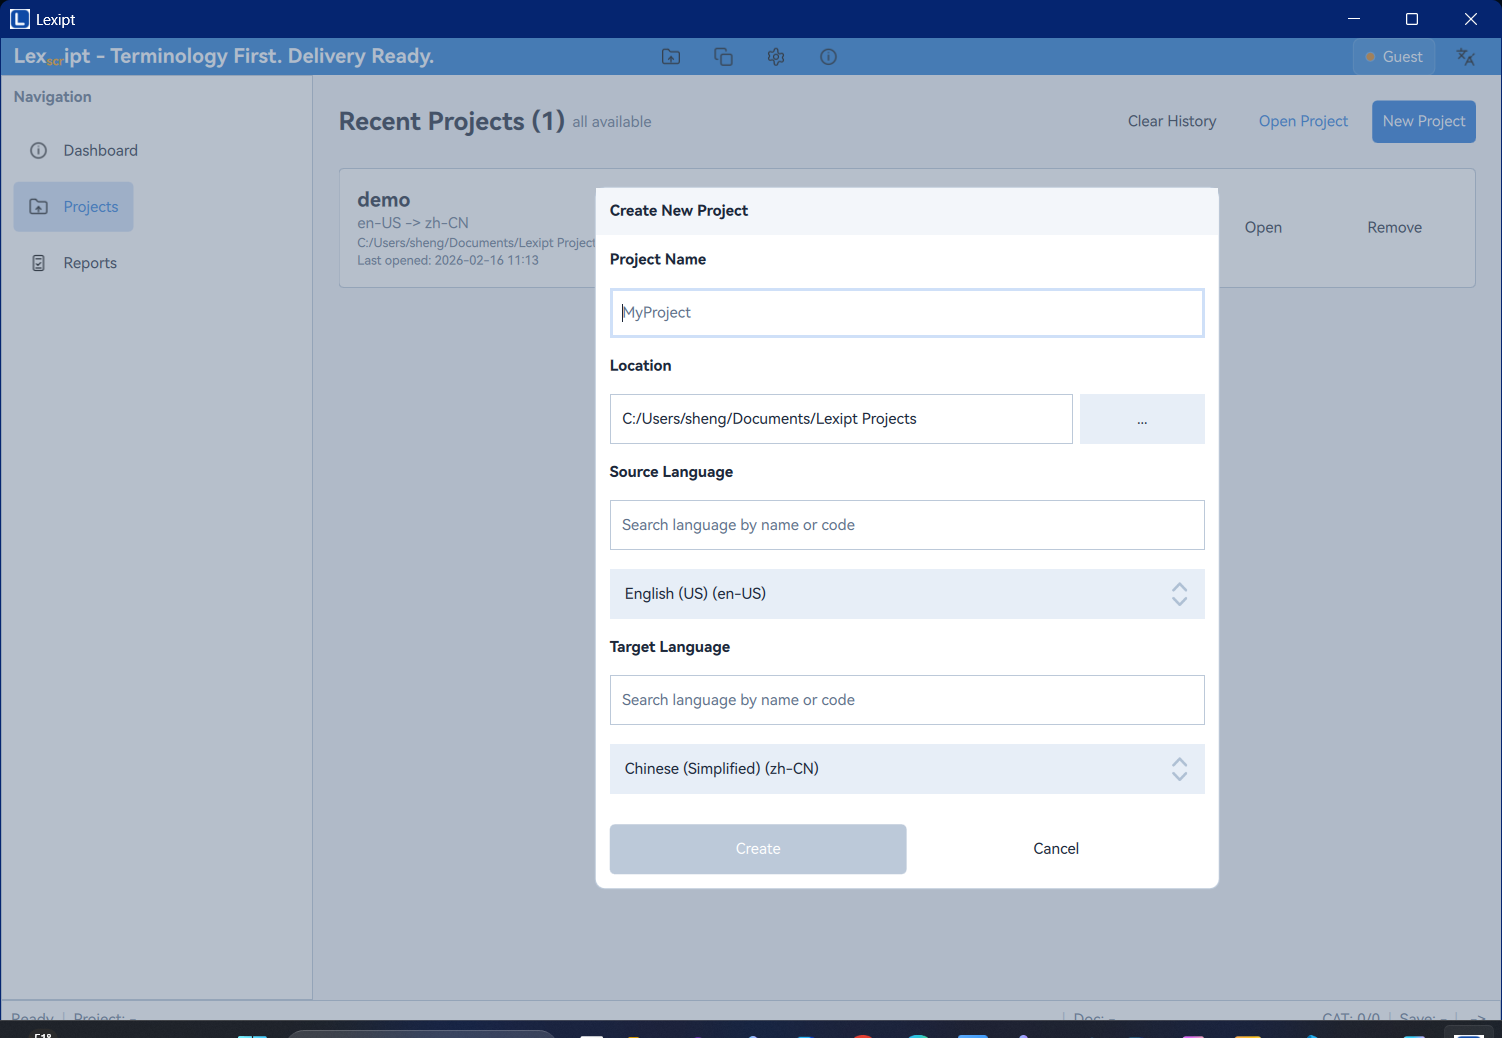
- After filling in the details, click Create. The application will automatically set up the required file structure and navigate to the project's Editor page.
3.2. Importing Source Files
After creating the project, we need to add the files to be translated.
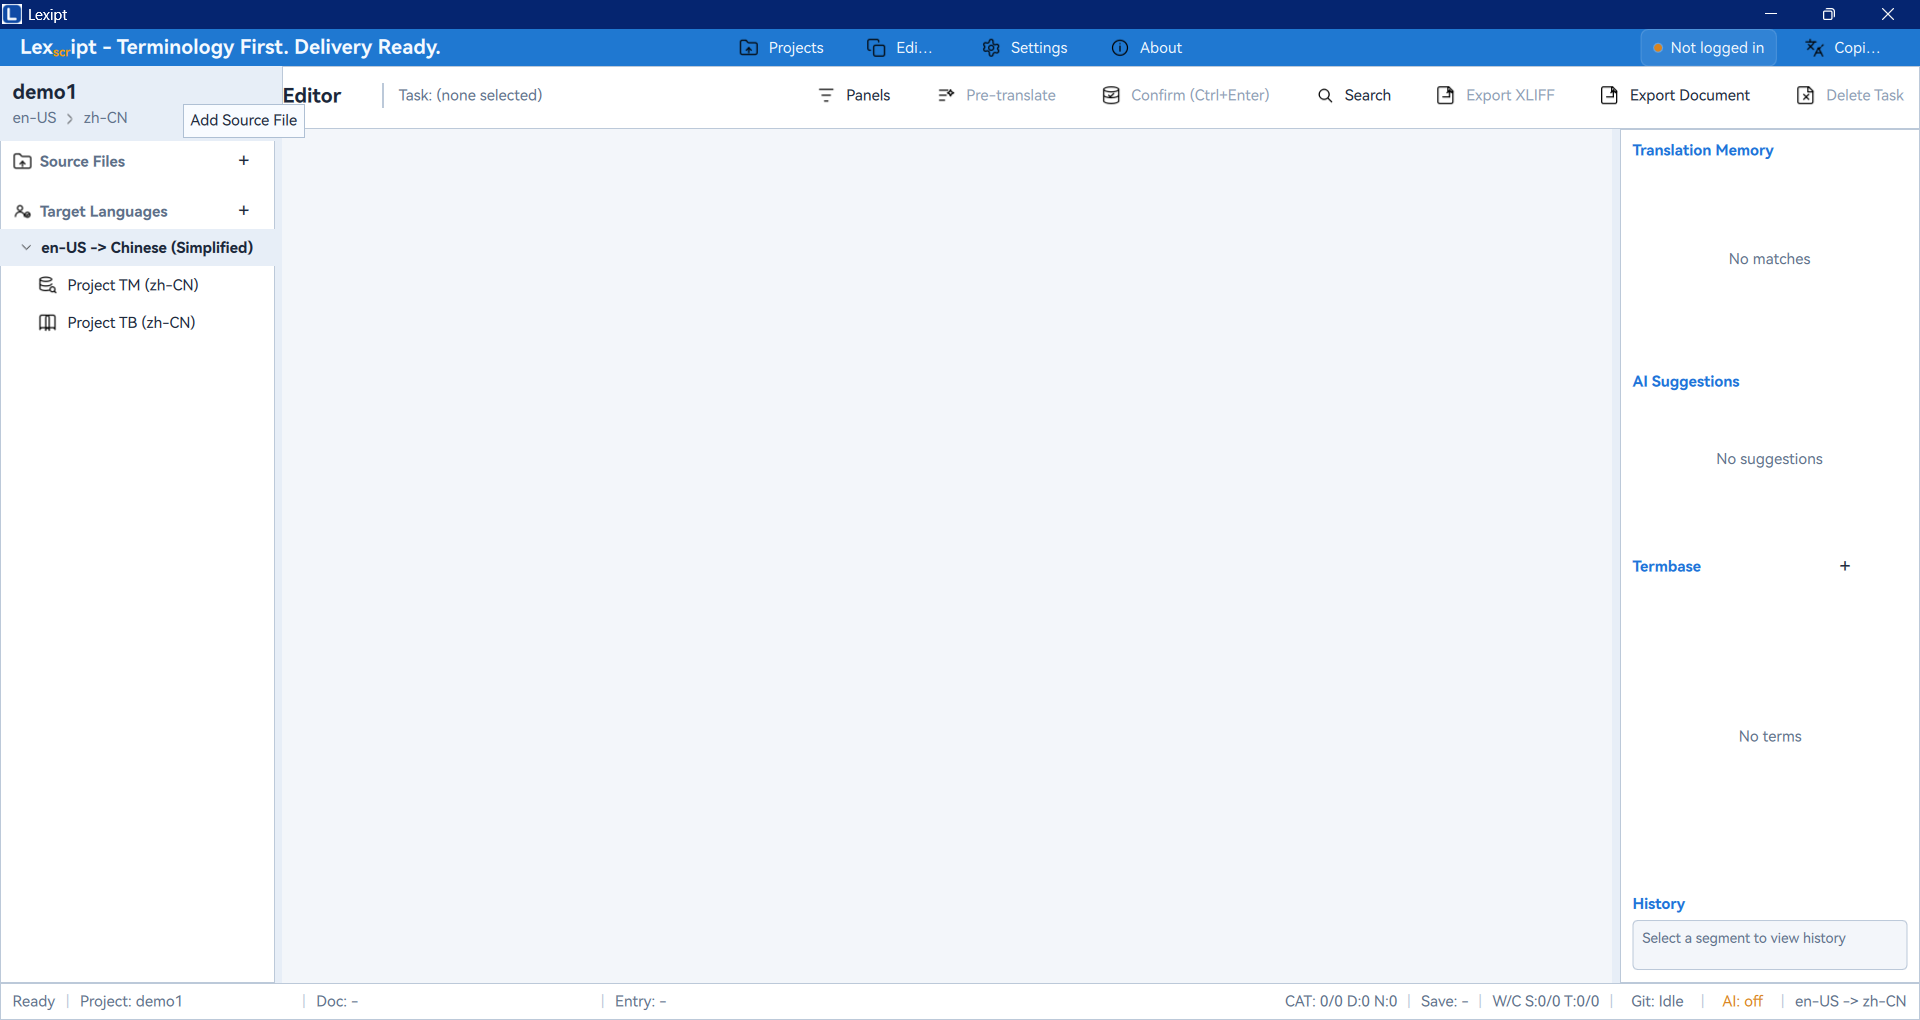
- In the Editor page, locate the Source Files area in the left "Project Panel".
- Click the + (Add Source File) button in the upper-right corner of that area.
- In the file picker dialog, find and select the document you want to translate (e.g., a
.txt,.docx, or.htmlfile). - After selecting the file, the application will display an Import Preview window that breaks your document content into multiple "Segments". This helps you verify that the file encoding and sentence splitting are correct.
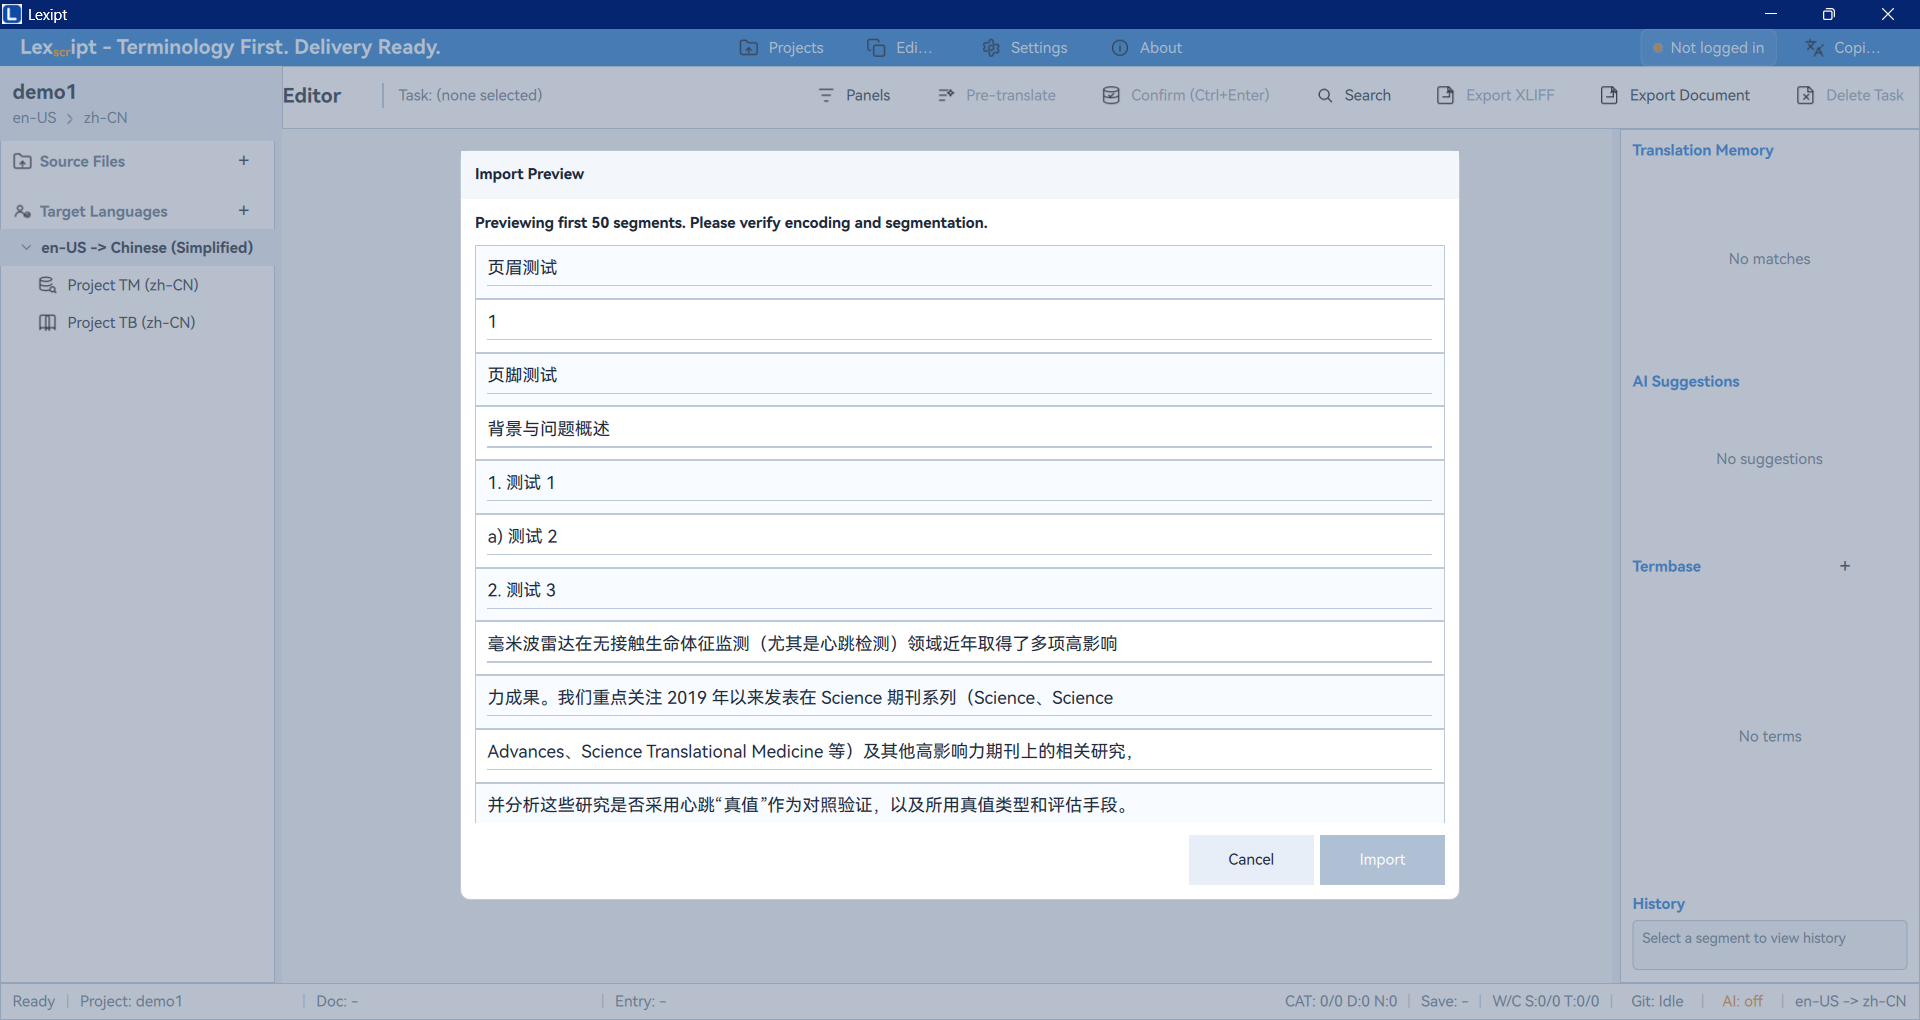
- Once confirmed, click Import. The file will be added to the project — you will see it in the project panel, and the editor's main area will load all segments from this file.
3.3. Translating Segments
Now, we can begin the core translation work.
- In the segment list in the center, click on any segment you want to translate.
- The source text of that segment will appear in the Source editor on the left.
- Enter your translation in the Target editor on the right.
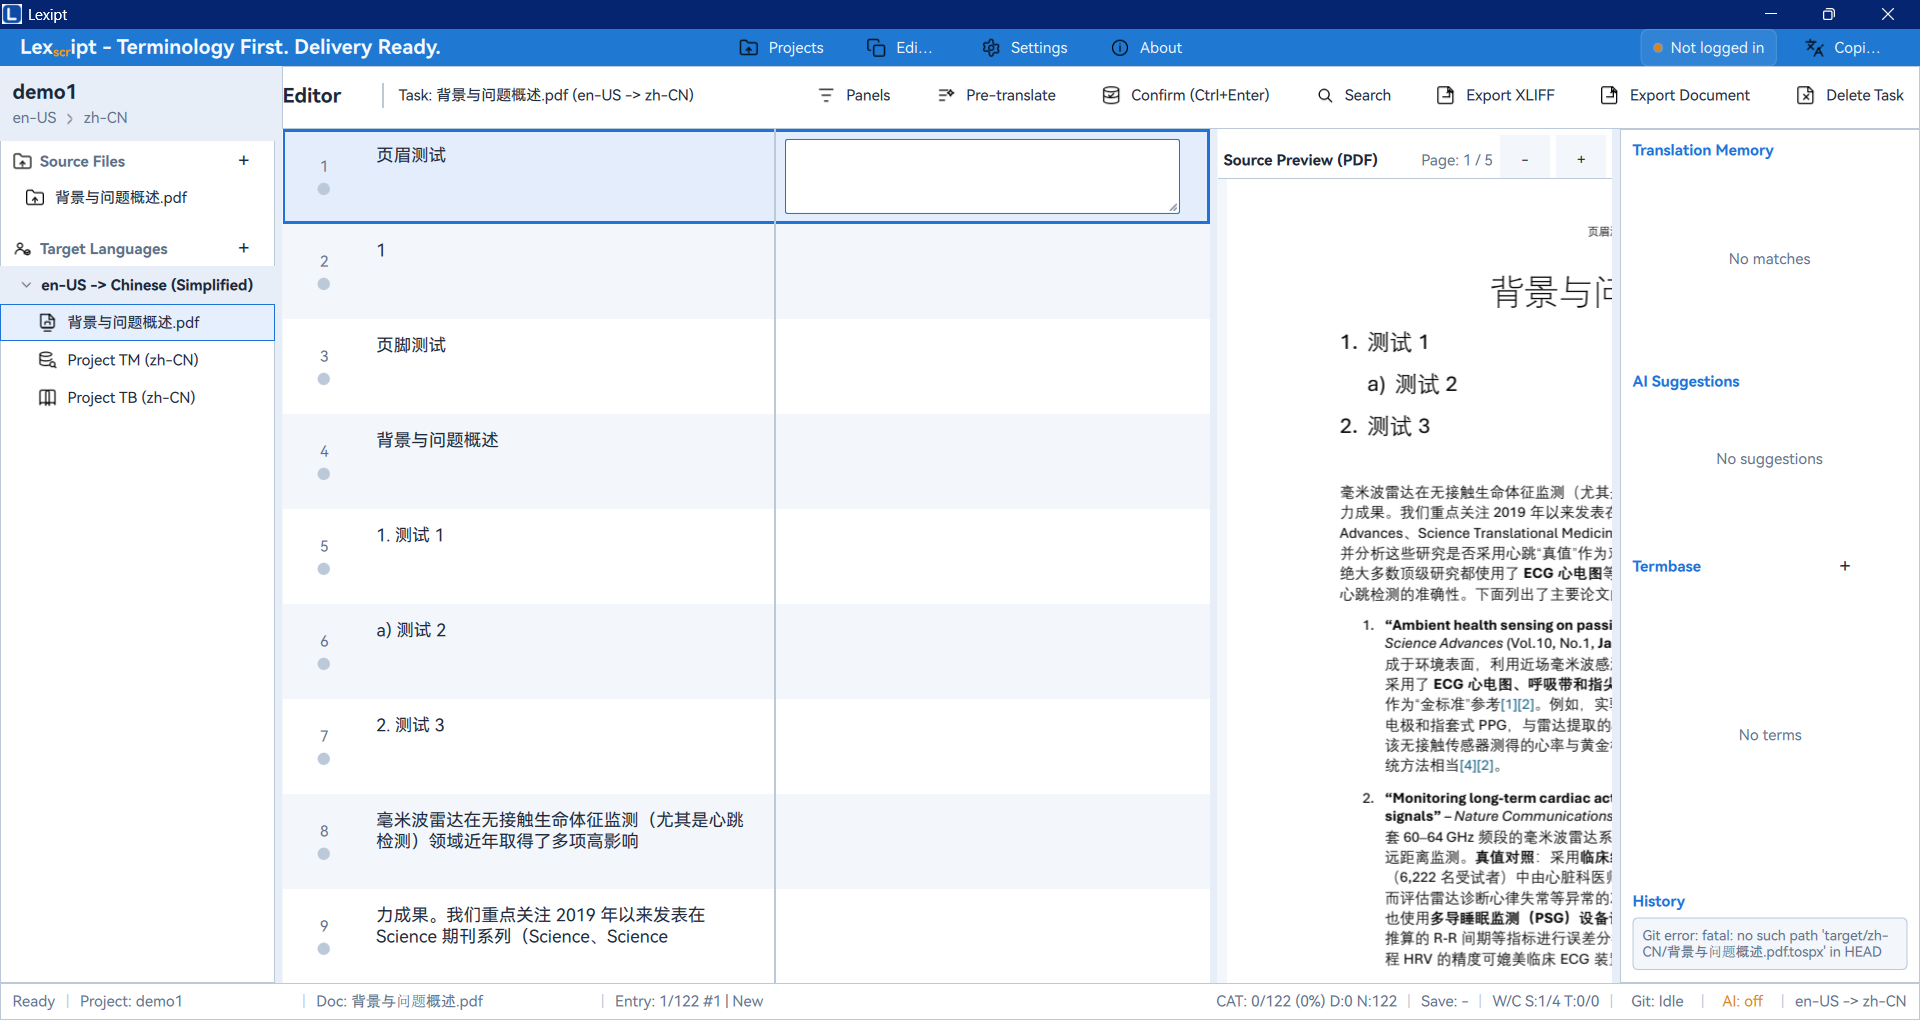
- As you type, the "TM/AI/TB/History" panel on the right may provide suggestions from Translation Memory (TM), AI, or Termbase (TB). You can adopt these suggestions directly or use them as reference.
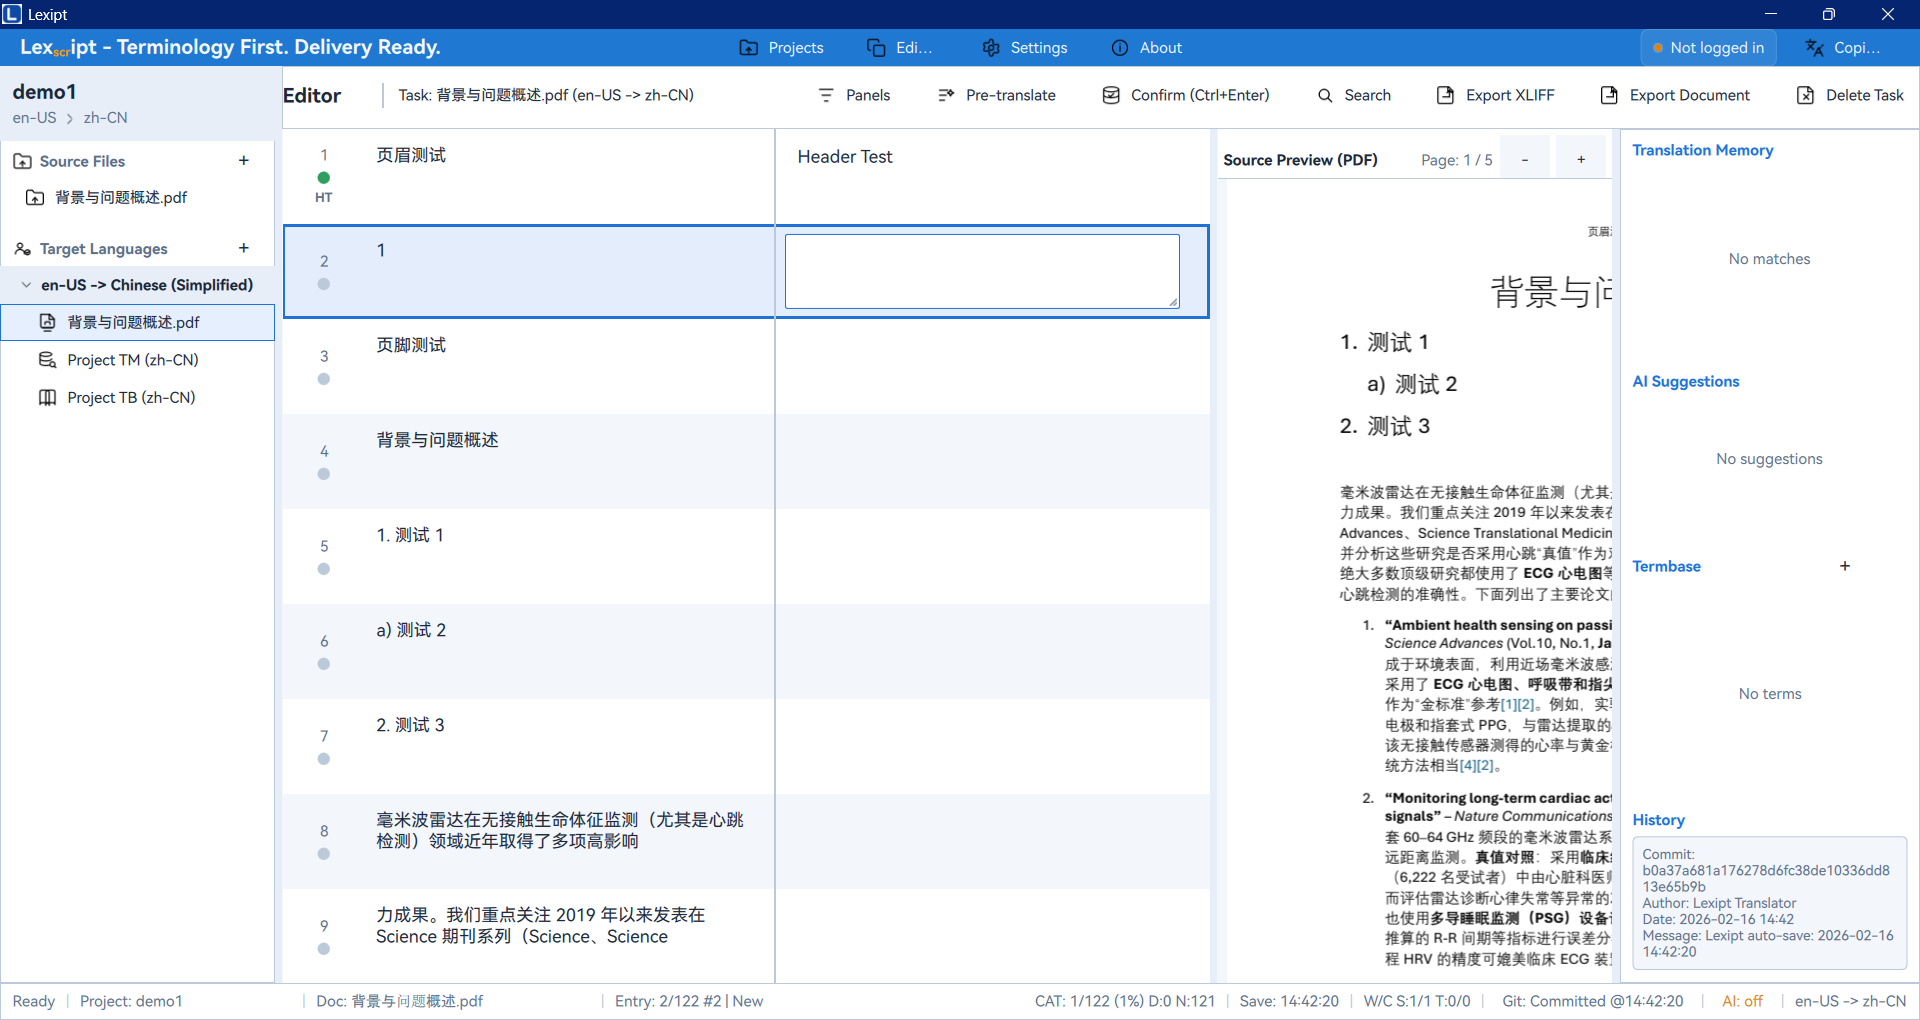
3.4. Confirming Segments
When you are satisfied with a segment's translation, you can "confirm" it.
- Make sure your cursor is still in the target editor.
- Press the shortcut
Ctrl + Enter, or click the Confirm button above the segment list. - After confirmation, the segment's status will change from untranslated to "Translated", typically marked with a green indicator. This translation pair will also be automatically saved to the project's Translation Memory (TM) for future use.

Repeat steps 3.3 and 3.4 until you have completed all segments.
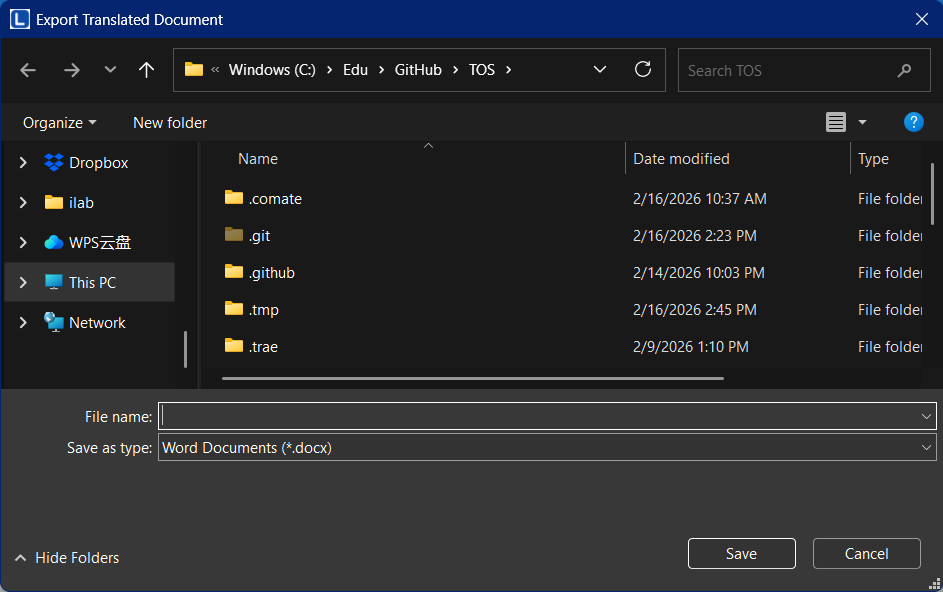
3.5. Exporting the Translation
After completing the translation, the final step is to export your work as a finished document.
- Click the Export Document button in the editor toolbar at the top.
- Choose the export format based on your source file type. For example, if your source file is
.docx, you should export as.docx. - In the dialog that appears, choose the save location and file name, then click Save.
Congratulations! You have successfully completed a full translation workflow in Lexipt. Next, we will explore the software's feature areas in more detail.
4. Interface Overview
Lexipt's main interface is designed to be clean and efficient, allowing you to quickly switch between different tasks. The interface is primarily composed of a left navigation bar and a right main work area.
4.1. Main Navigation Bar
The vertical bar on the far left of the application is the main navigation bar, containing entry points to all core features.
- Dashboard: Your workspace and information center, displaying statistics and recent activity.
- Projects: Where you manage all translation projects, including creating, opening, and deleting projects.
- Editor: The core translation workspace where you will spend most of your time.
- Reports: View detailed charts about project progress and personal productivity.
- Settings: Configure various features of the software, including interface, AI, collaboration, etc.
- System Copilot: The robot icon at the bottom of the navigation bar — invoke the AI assistant at any time.
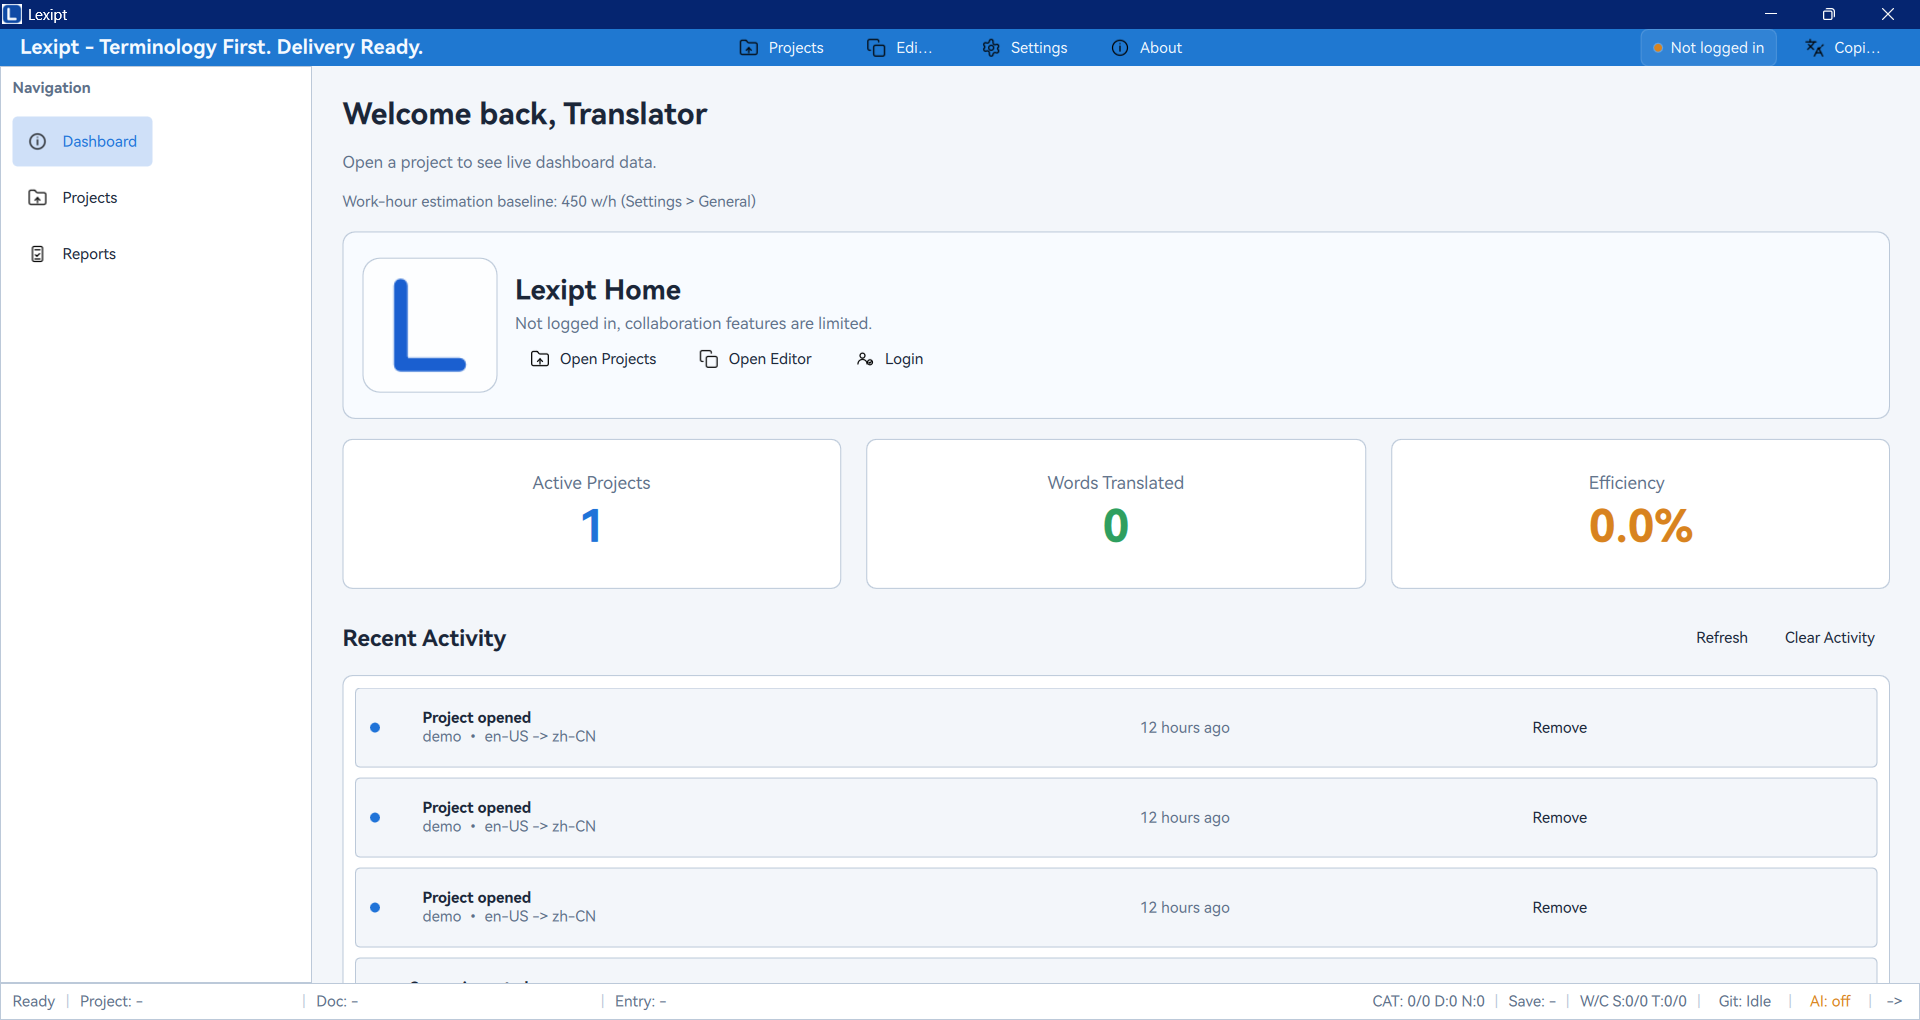
4.2. Dashboard
When you launch the software or have no project open, you will see the Dashboard. It provides an overview of your work.
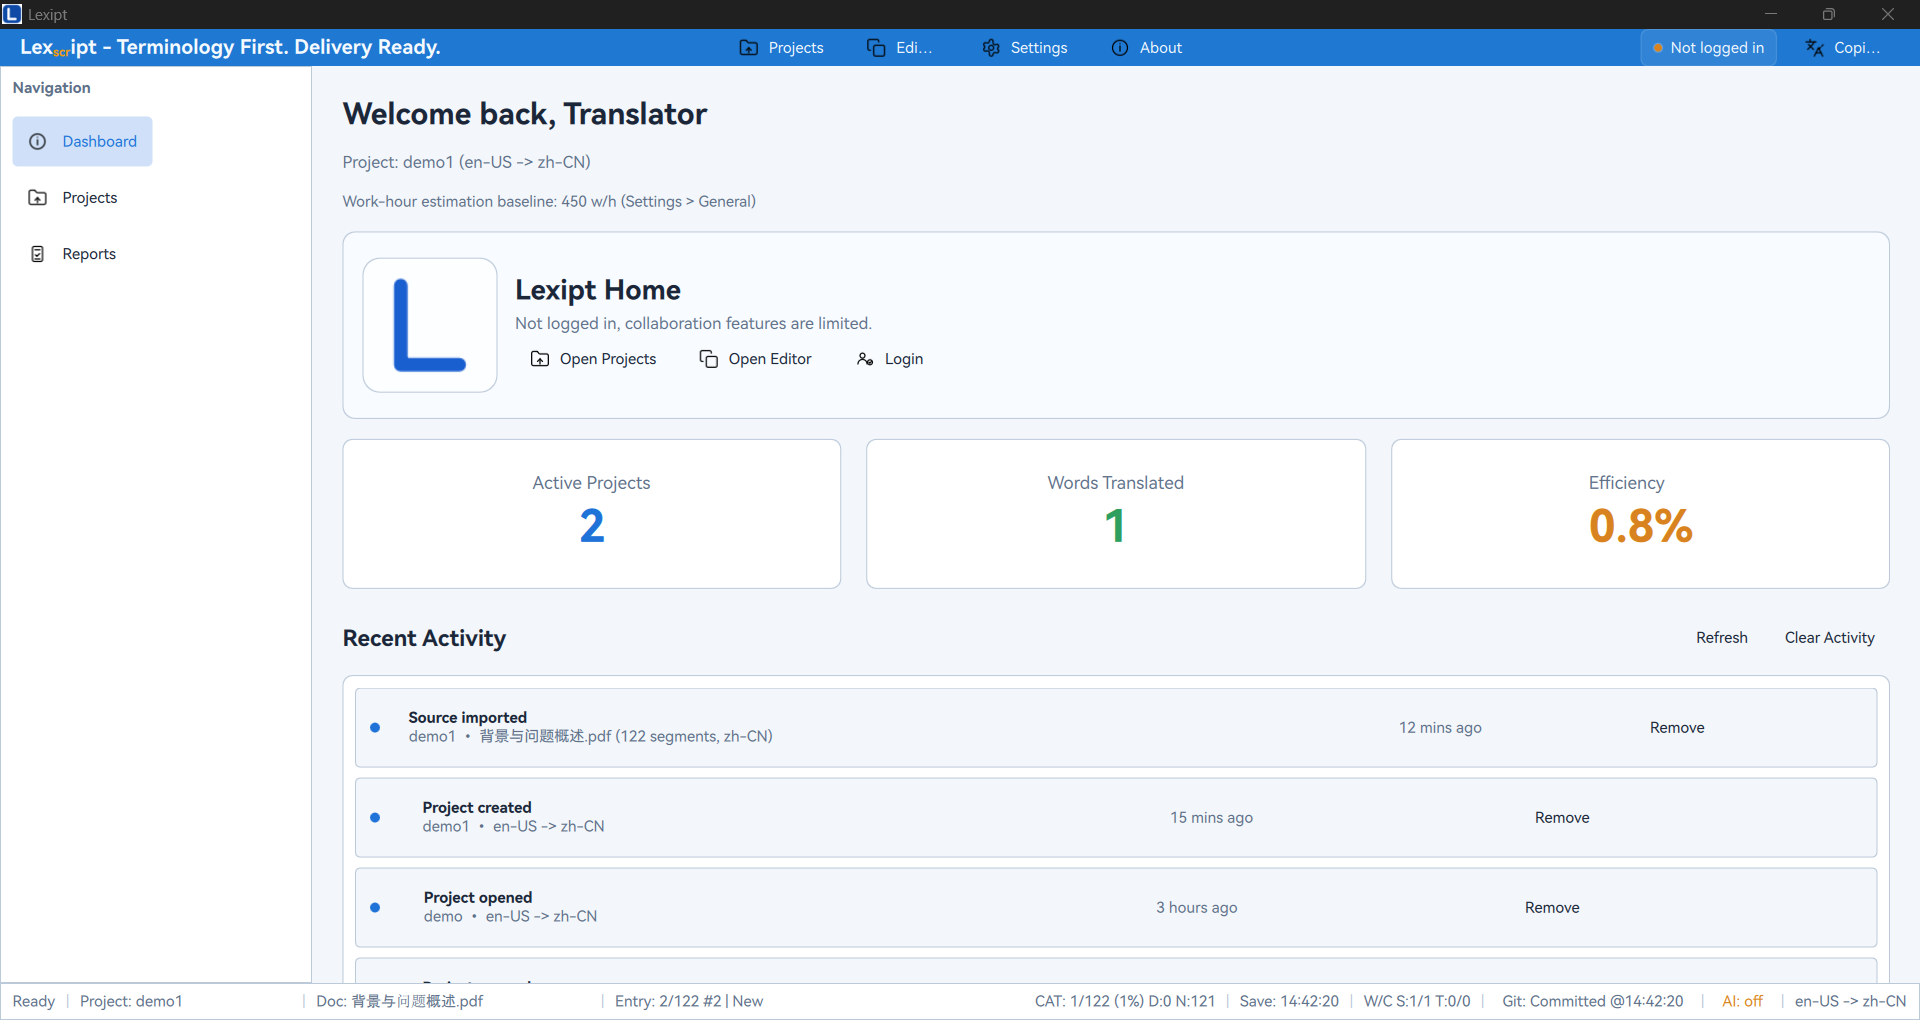
- Key Metrics: Cards at the top quickly display your core data, such as translated word count and productivity.
- Recent Projects: Quick access to your most recently worked-on projects.
- Recent Activity: A dynamic timeline recording your latest actions, such as confirming segments, creating projects, etc.
4.3. Projects
The Projects page is the central hub for all your translation projects.
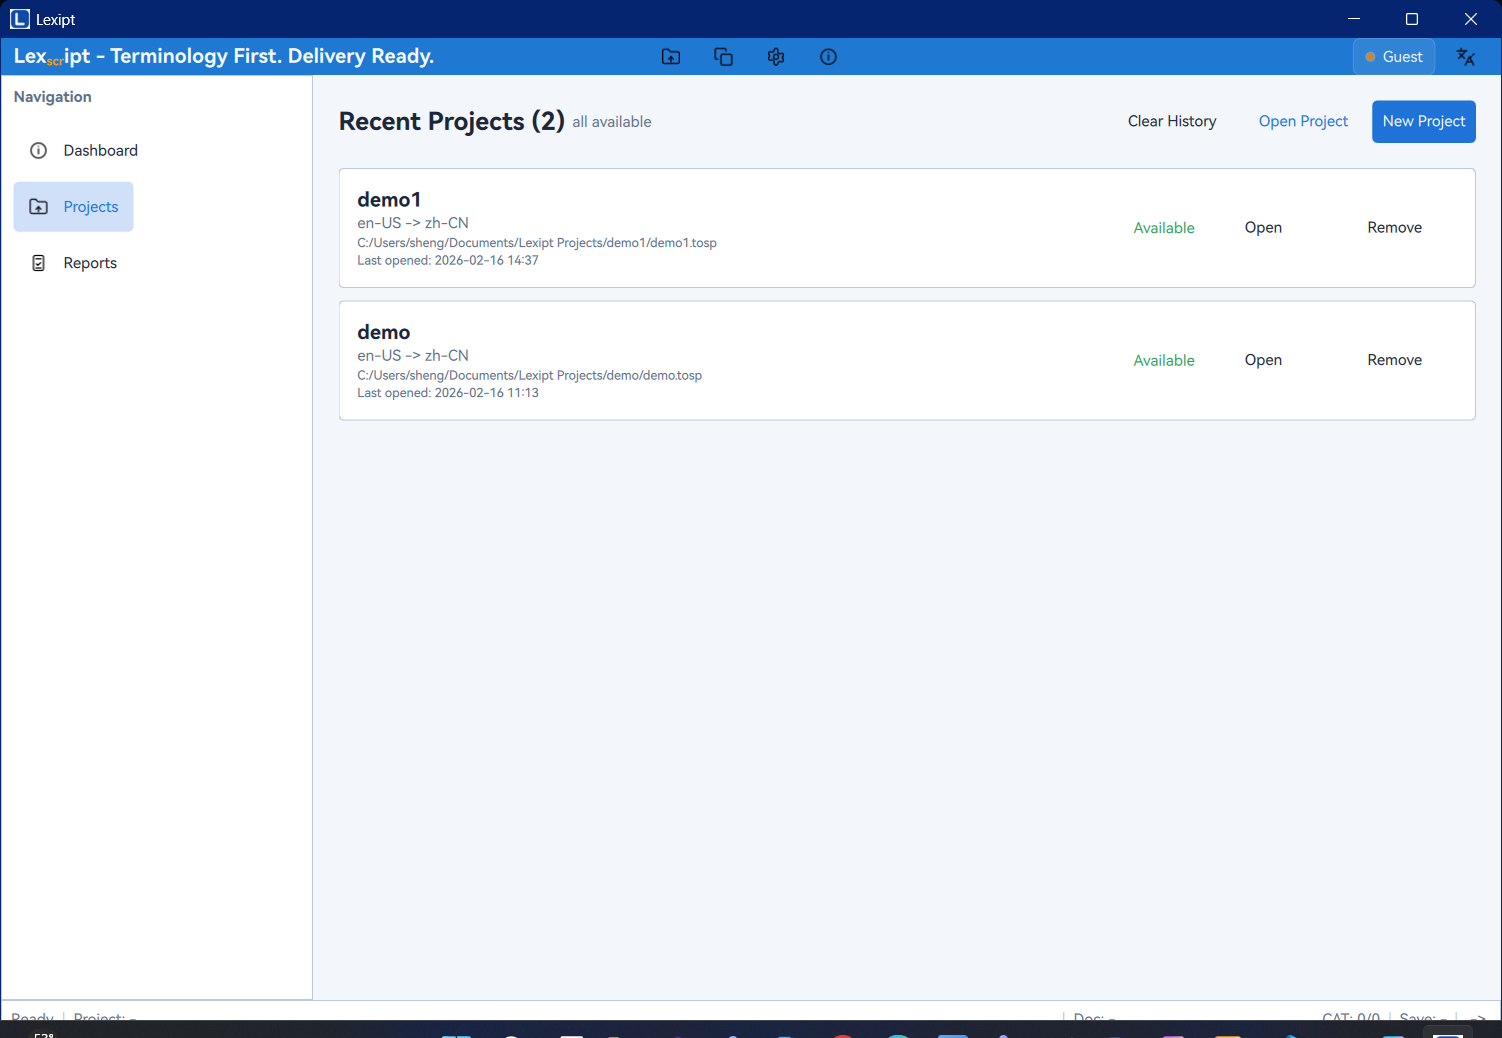
- Recent Projects List: Displays your recently opened projects, including their names, paths, and status (available or missing).
- Actions: You can create new projects or open existing ones from this page. For each project in the list, you can also open it, reveal in file explorer, or remove it from the history.
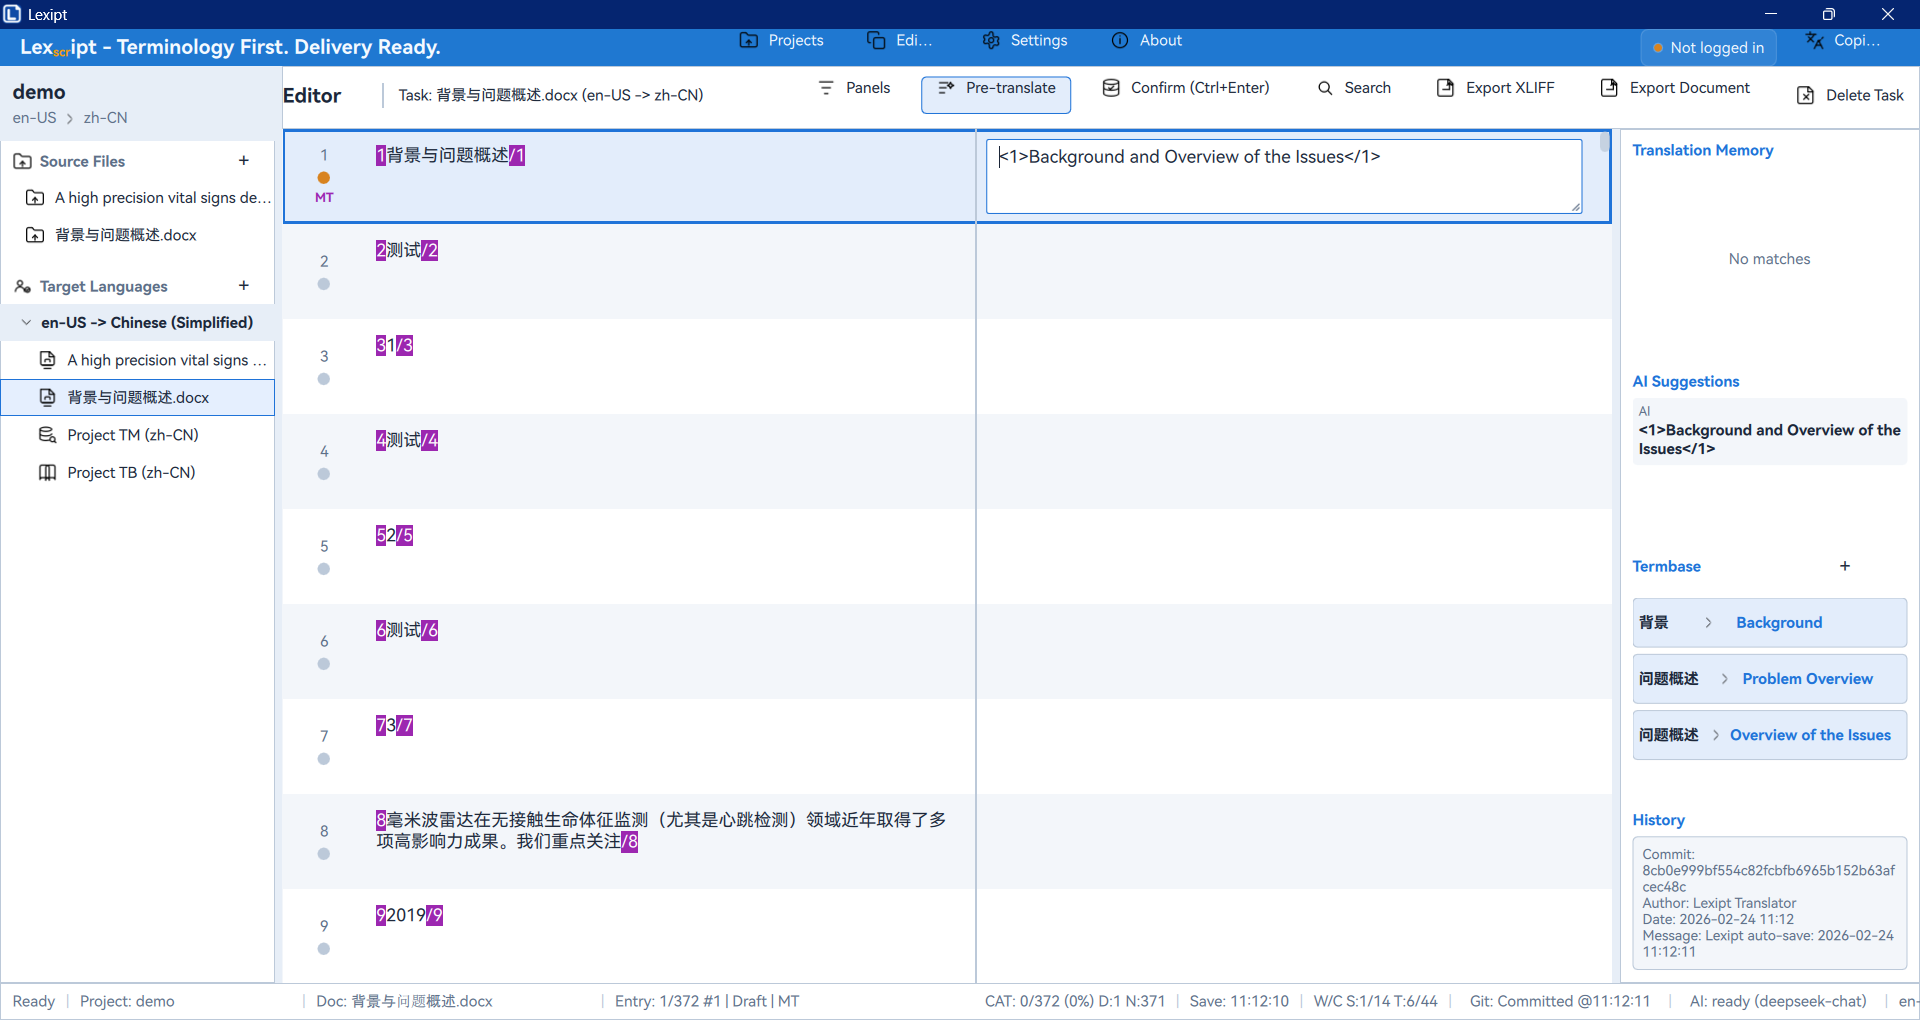
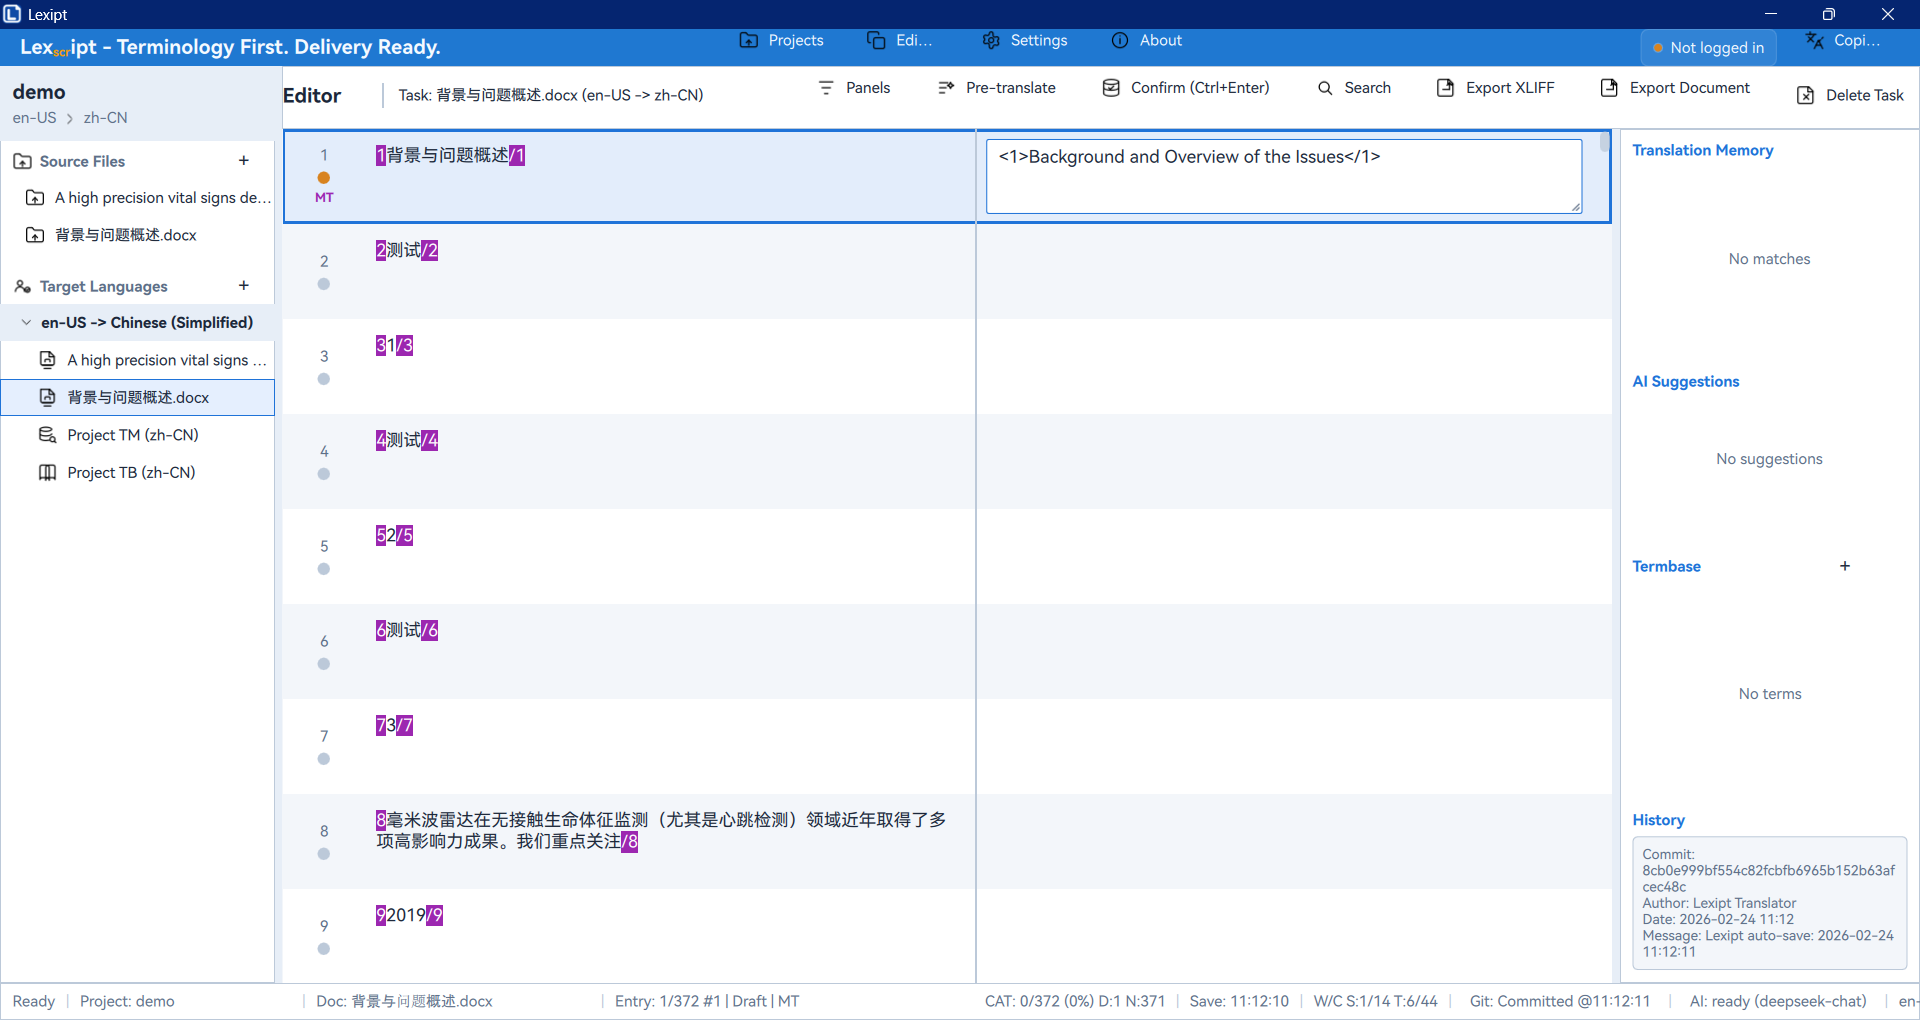
4.4. Editor
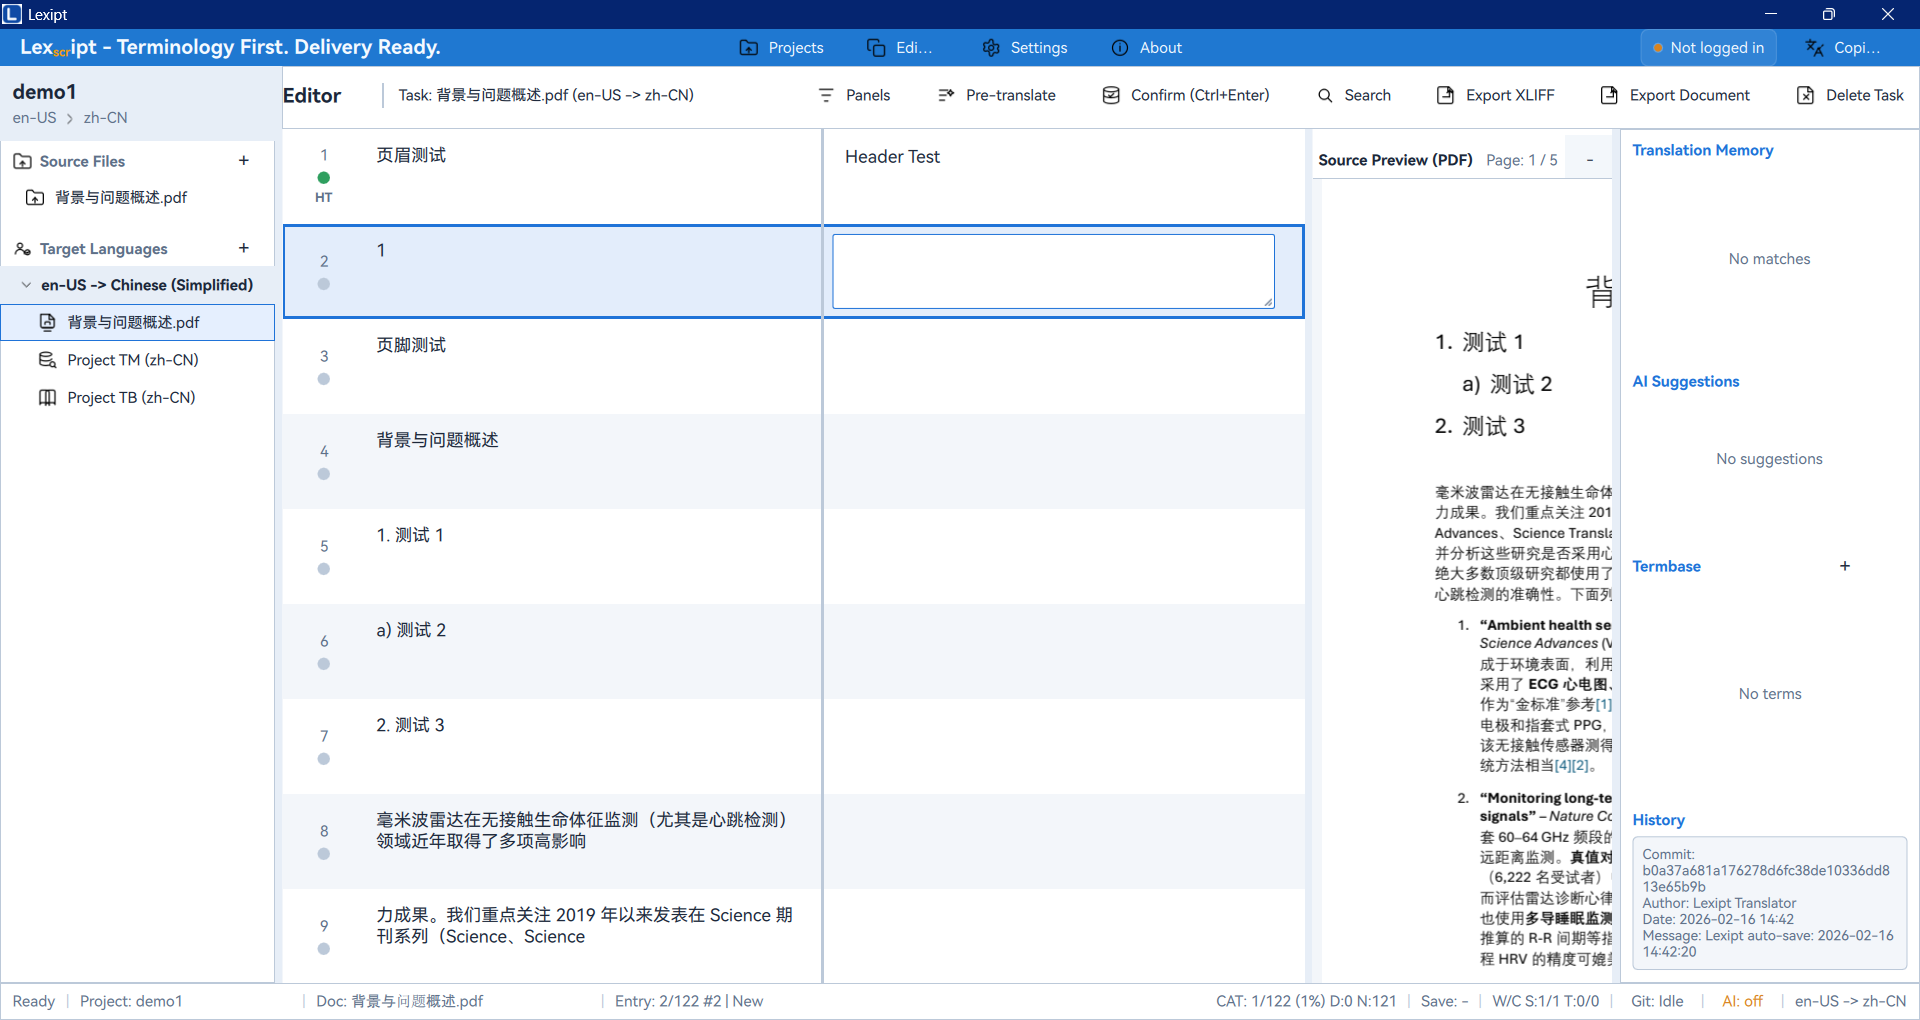
The Editor is Lexipt's most feature-rich interface, composed of multiple resizable panels.
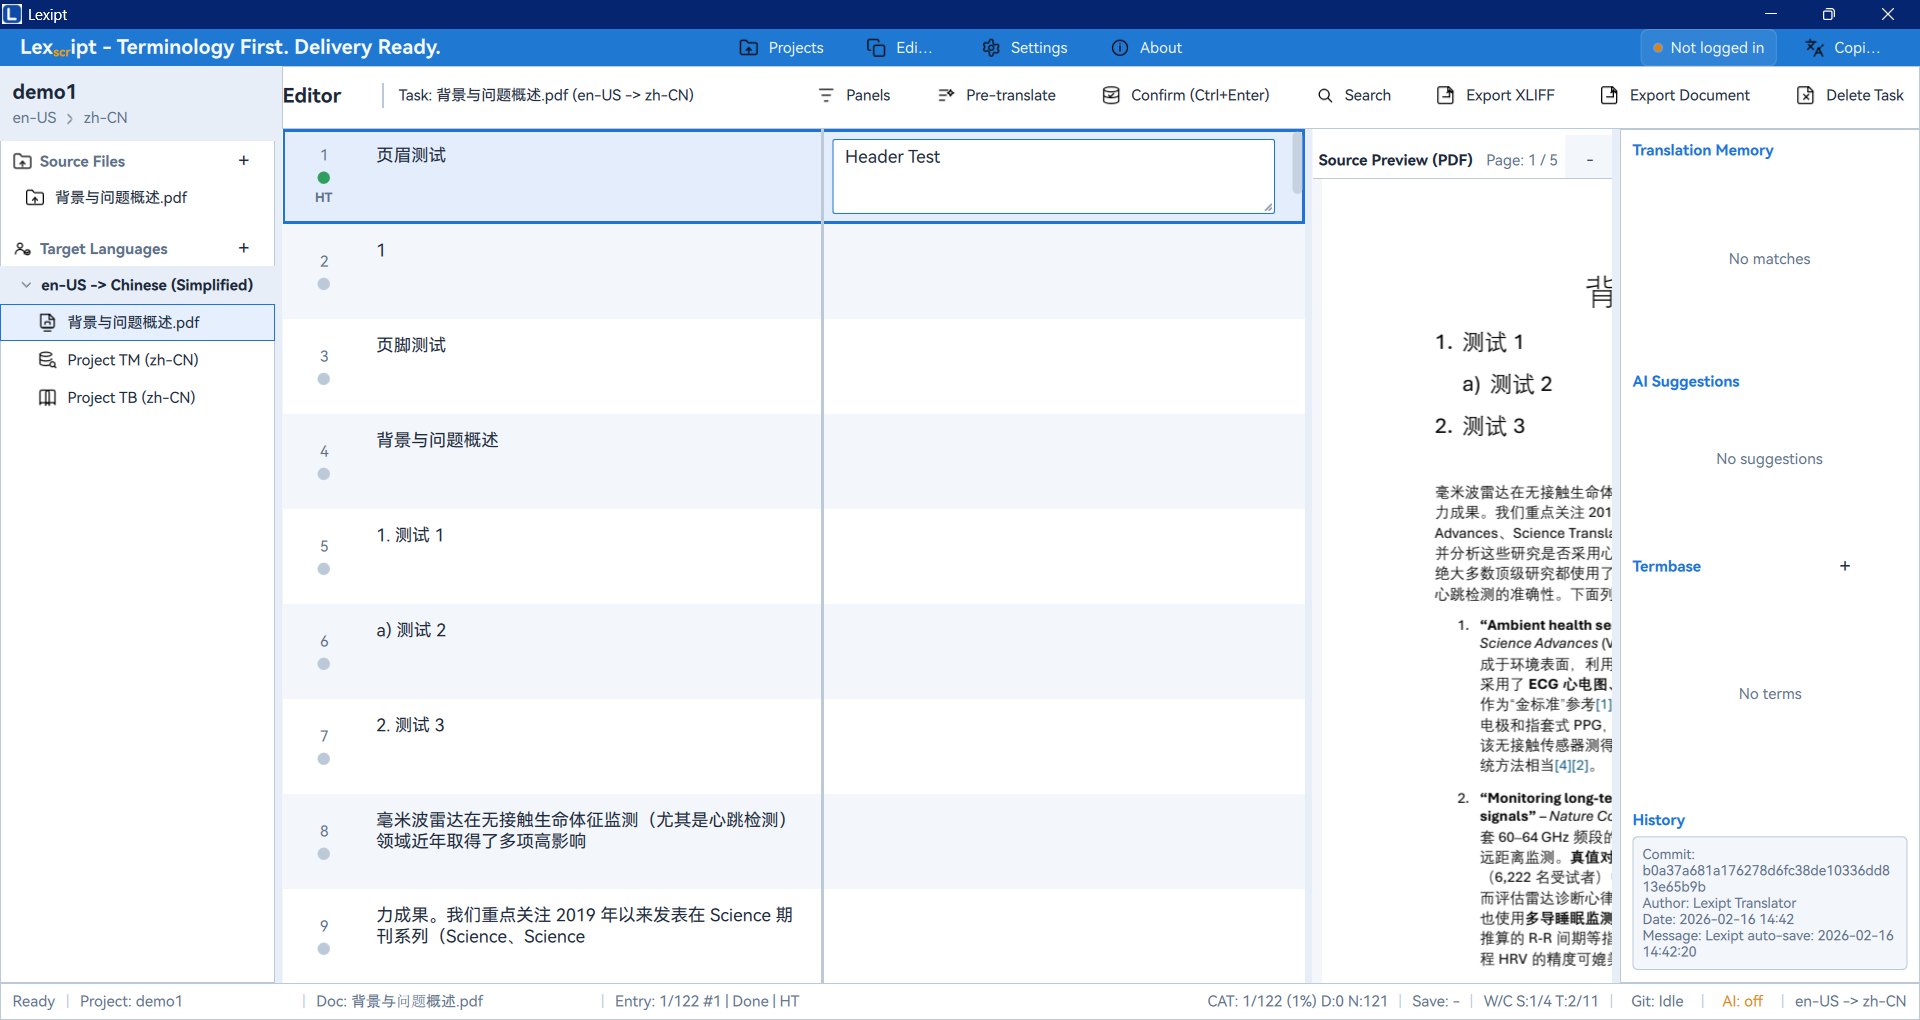
- Project Panel: Typically on the left, showing all files in the current project in a tree structure. You can manage source files, translation tasks, and multilingual resources.
- Segment Editor: In the center, this is where you do your primary translation work. It displays all segments in a list format — click on one to edit it in the source/target editors below.
- Assistance Panel: Typically on the right, this is a multi-tab panel providing powerful translation assistance:
- Translation Memory: Shows previously translated content similar to the current segment.
- AI Suggestions: Gets translation suggestions from configured AI services.
- Termbase: Highlights defined terminology appearing in the current segment.
- History: View all historical revisions of the current segment.
- Preview Panel: Typically at the bottom-right, providing a real-time preview of the source file's (e.g., PDF) layout to help you better understand context.
4.5. Reports
The Reports page visualizes your work data, helping you analyze efficiency and project progress.
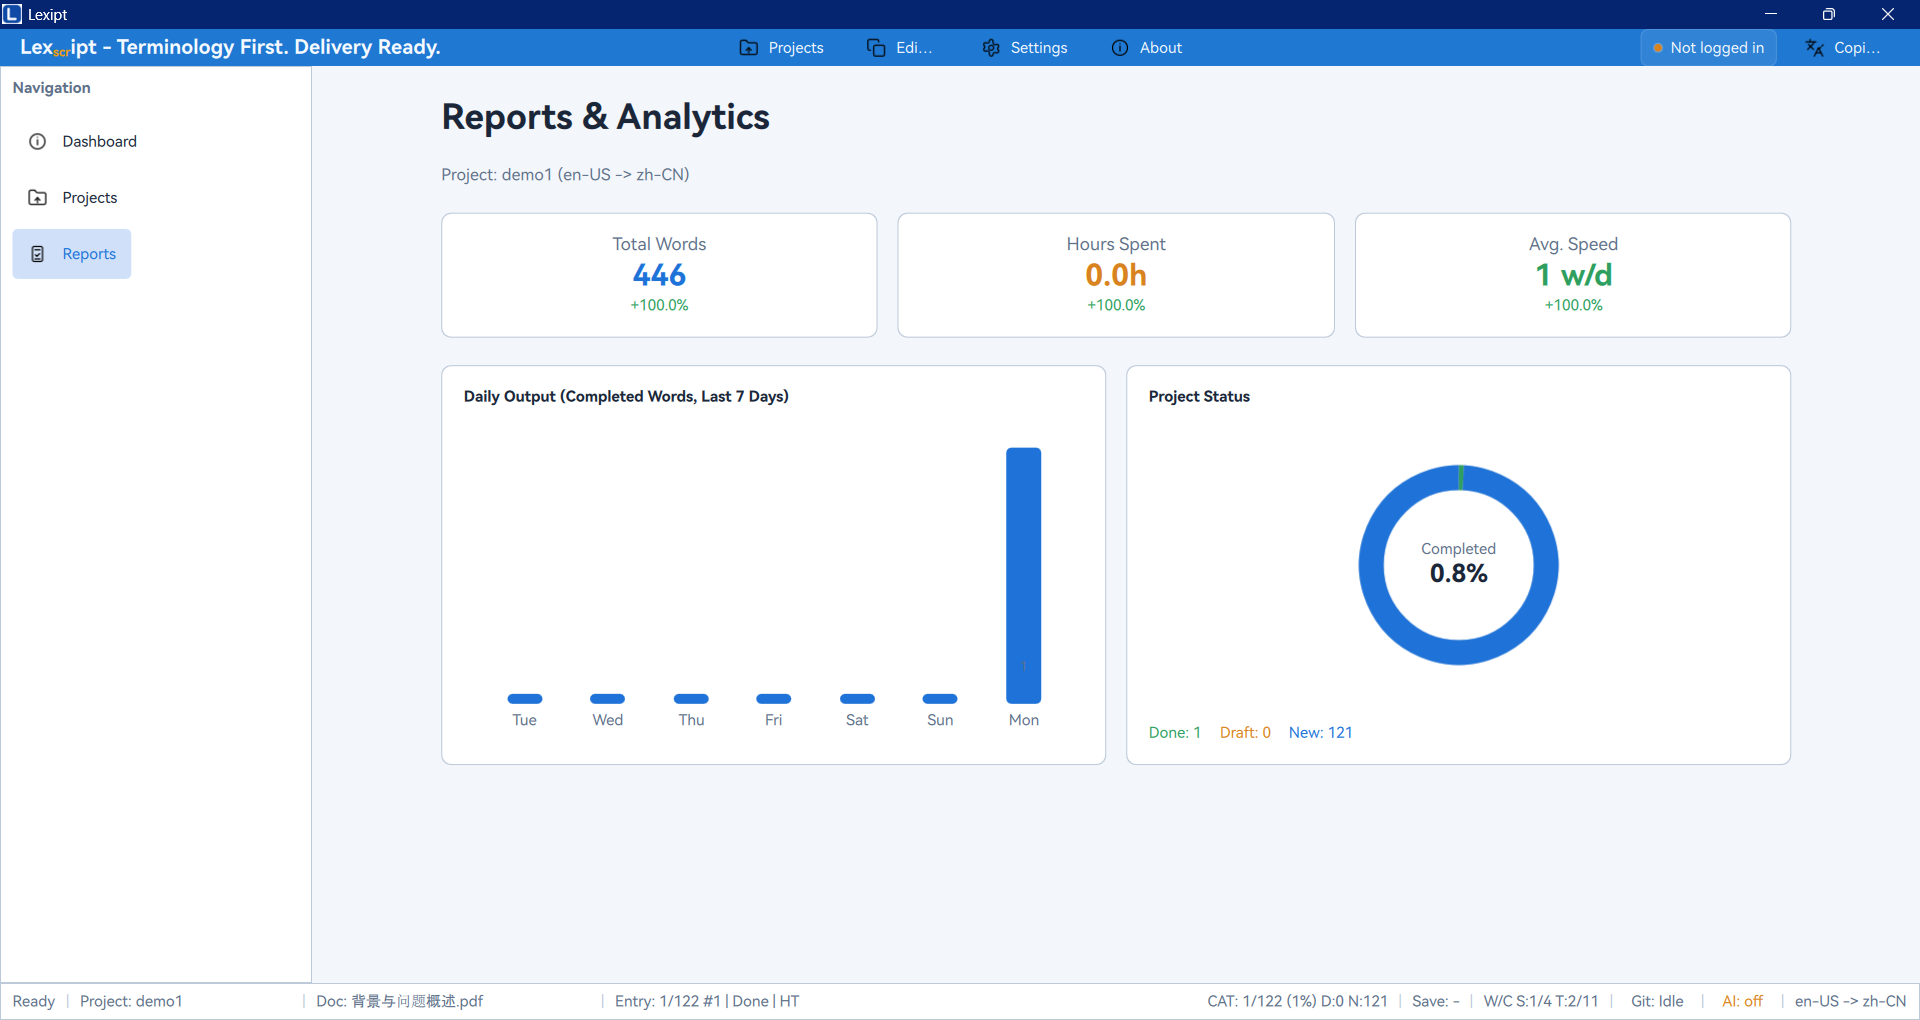
- Daily Output Chart: A bar chart showing your recent daily translated word count.
- Project Status Pie Chart: Visually displays the proportion of completed, draft, and untranslated segments in the current project.
4.6. Settings
The Settings page allows you to deeply customize the software to match your habits and needs.
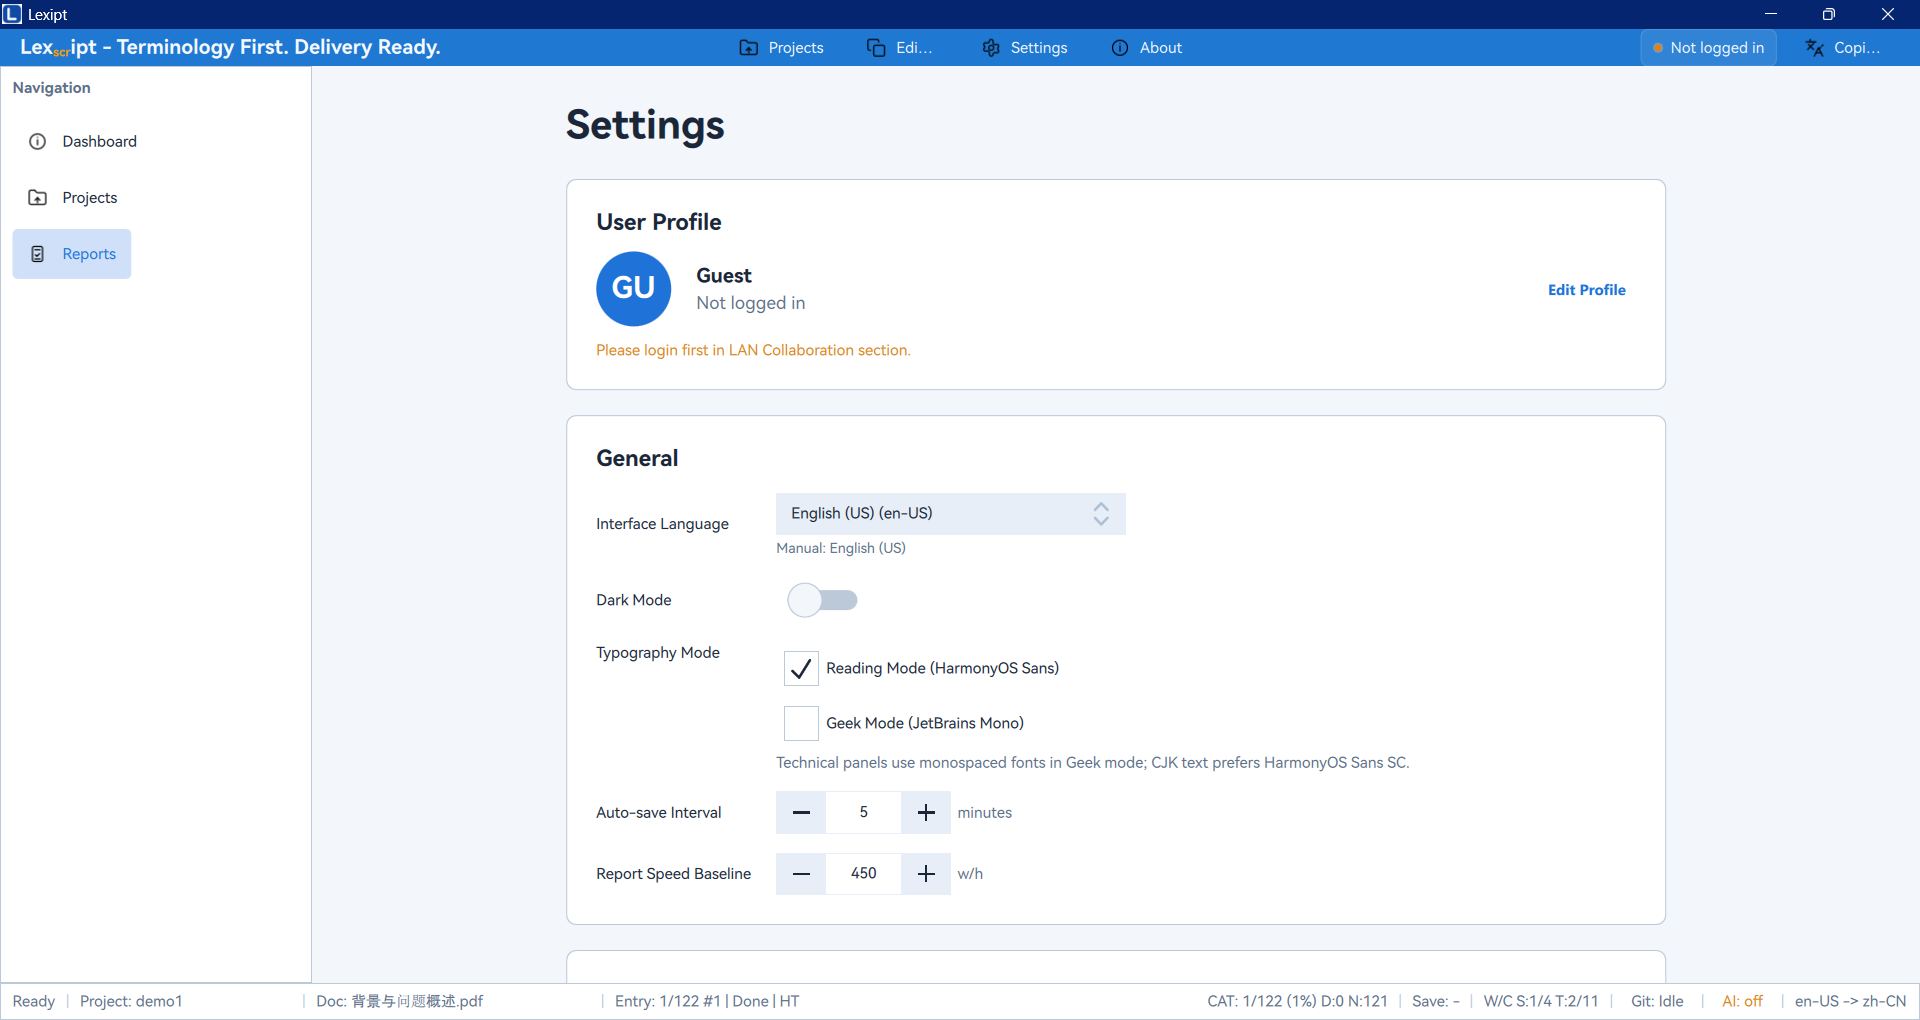
This page is composed of multiple sub-pages, such as:
- General: Adjust interface language, theme (light/dark), etc.
- Editor: Customize editor fonts, display options, etc.
- AI Settings: Add and manage AI service connections for translation assistance.
- Collaboration: Configure connection settings for the team collaboration server.
- Segmentation: Entry point for advanced users to customize SRX segmentation rules.
5. Core Workflows
After familiarizing yourself with the basic interface, this chapter dives deeper into Lexipt's core features and standard workflows.
5.1. Project Creation & Management
A project is the fundamental unit for organizing all work in Lexipt. A project contains a set of source files, corresponding translation tasks, and related resources (such as TM and Termbase).
Creating a New Project
As shown in the "Quick Start" section, creating a new project is the first step in all workflows.
- Navigate to the Projects page.
- Click New Project.
- In the dialog that appears, pay attention to these key settings:
- Project Name: The project name, which will become the project folder name.
- Location: The parent directory for the project folder. For example, if you choose
D:\Translationsand name the projectProjectA, your project will be created atD:\Translations\ProjectA. - Source/Target Language: Selecting the correct languages is crucial — it affects Translation Memory, AI translation, and quality check behavior. The language list supports search — you can type a language name (e.g.,
German) or code (e.g.,de-DE) to find it quickly.
Opening an Existing Project
You can open an existing project in two ways:
- From the Recent Projects List: On the Projects page, simply click a project card to open it. If the project file location has changed, the card will show as "Missing" — you can click "Locate .tosp..." on the card to manually specify the new project file path.
- Manual Open: Click the Open Project button, then browse and select the project's
.tospfile.
Understanding the Project Folder Structure
When you create a project, Lexipt generates a folder with standardized subdirectories at your specified location. Understanding these folders helps you manage project files more effectively.
/MyFirstTranslation/
├── .tosp                  <-- Main project file; double-click to open in Lexipt
├── source/                <-- Stores your imported original documents
│   └── document1.docx
├── target/                <-- Stores translation work files organized by target language
│   └── zh-CN/
│       └── document1.txlf   <-- Translation task file (XLIFF-based)
├── tm/                    <-- Stores the project-specific Translation Memory (TM)
│   └── auto.tmt
└── term/                  <-- Stores the project-specific Termbase
└── auto.tbt- The
.tospfile is the core of the project, recording all configuration information. - The
sourcedirectory stores unmodified original documents. - Each subfolder under
targetrepresents a target language, where.txlffiles store your actual translation work. tmandtermstore the automatically generated Translation Memory and Termbase respectively.
Managing Project Files & Languages
After creating a project, you can manage files and languages in the Project Panel on the left side of the Editor page.
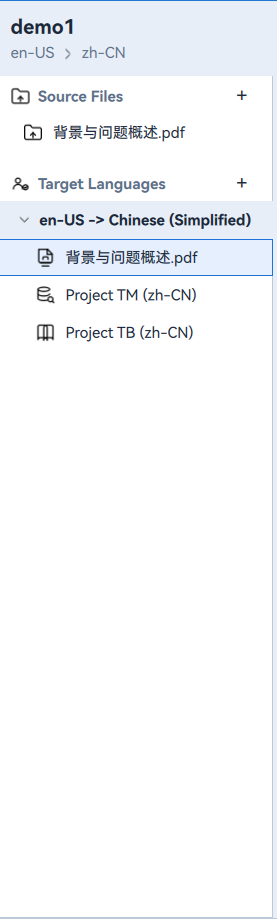
- Add Source Files: Click the
+button next to theSource Filesheading to add new documents to the project at any time. Supported formats include.txt,.html,.docx,.md, etc. - Delete Source Files: Right-click a source file and select
Delete Source File.... This action also deletes all target language translation task files for that source file — use with caution. - Add Target Language: Click the
+button next to theTarget Languagesheading to add a new target language to the current project. The software will automatically create translation tasks for all source files in the new language. - Switch and Delete Target Languages:
- Right-click a target language and select
Set Active Languageto make it the currently active language in the editor. - Right-click a target language and select
Delete Language...to remove that language and all its translation tasks.
- Right-click a target language and select
5.2. Translation & Editing
This is the core translation workflow, primarily done in the Editor view.
Segment Editor Details
When you select a translation task (.txlf file) in the Project Panel, the main work area displays the Segment Editor. This is a table-like list where each row represents a segment.
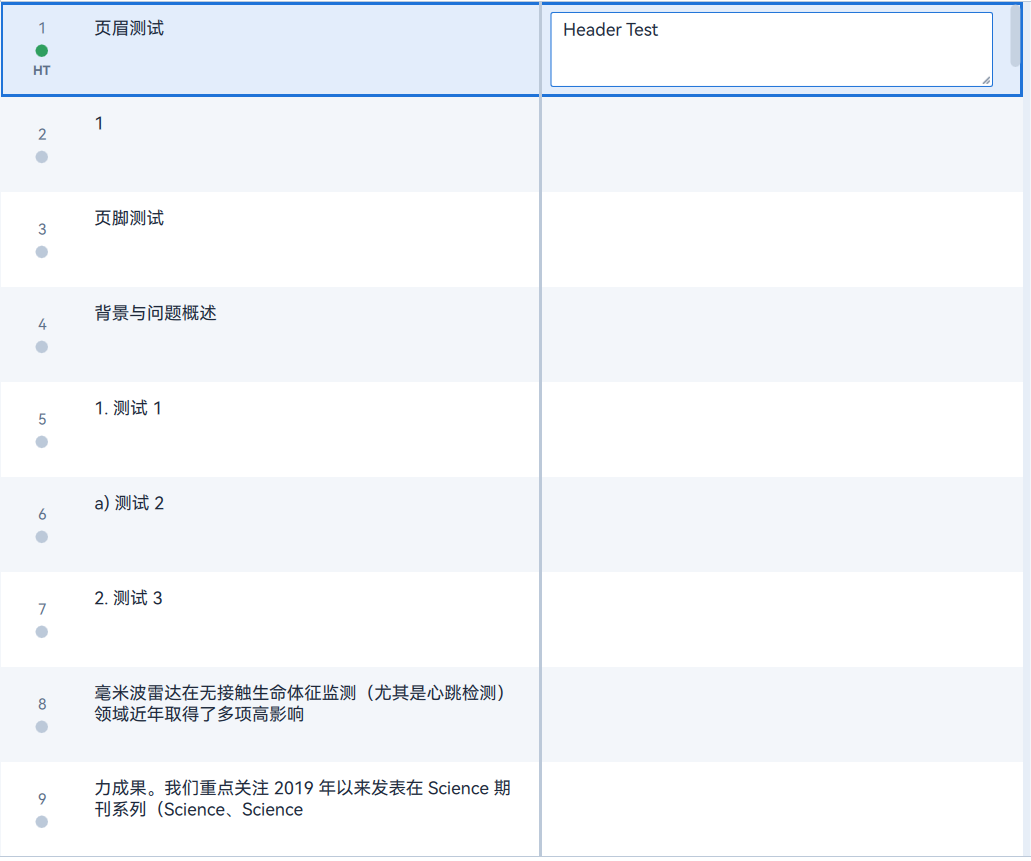
- #: The segment number.
- Status: A color marker indicating the current translation status of the segment.
- Source: The original text.
- Target: Your translation input area.
Below the list is the detailed editing area for the currently active segment, with source text on the left and target text on the right.
Segment Status
Each segment has a status to help you track progress. Status is indicated by colors and icons at the beginning of each row.
- New (Untranslated): The default status, typically white or no special background. Indicates the segment has no translation yet.
- Draft: Typically a yellow background. Indicates you have entered a translation but have not yet confirmed it. A segment automatically becomes a draft when you type in it.
- Translated (Confirmed): Typically a green background. Indicates you are satisfied with the translation and have confirmed it.
You can also manually change the status: right-click a segment and choose Mark as Translated, Mark as Draft, or Mark as New from the context menu.
Navigation, Filtering & Search
When working with long documents, efficient navigation and search capabilities are essential.
- Navigation: Use mouse clicks or the up/down arrow keys to move between segments.
- Filtering: At the top of the segment list, there is typically a filter toolbar that lets you show only segments with a specific status (e.g., only show all "Untranslated" segments) so you can focus on specific tasks.
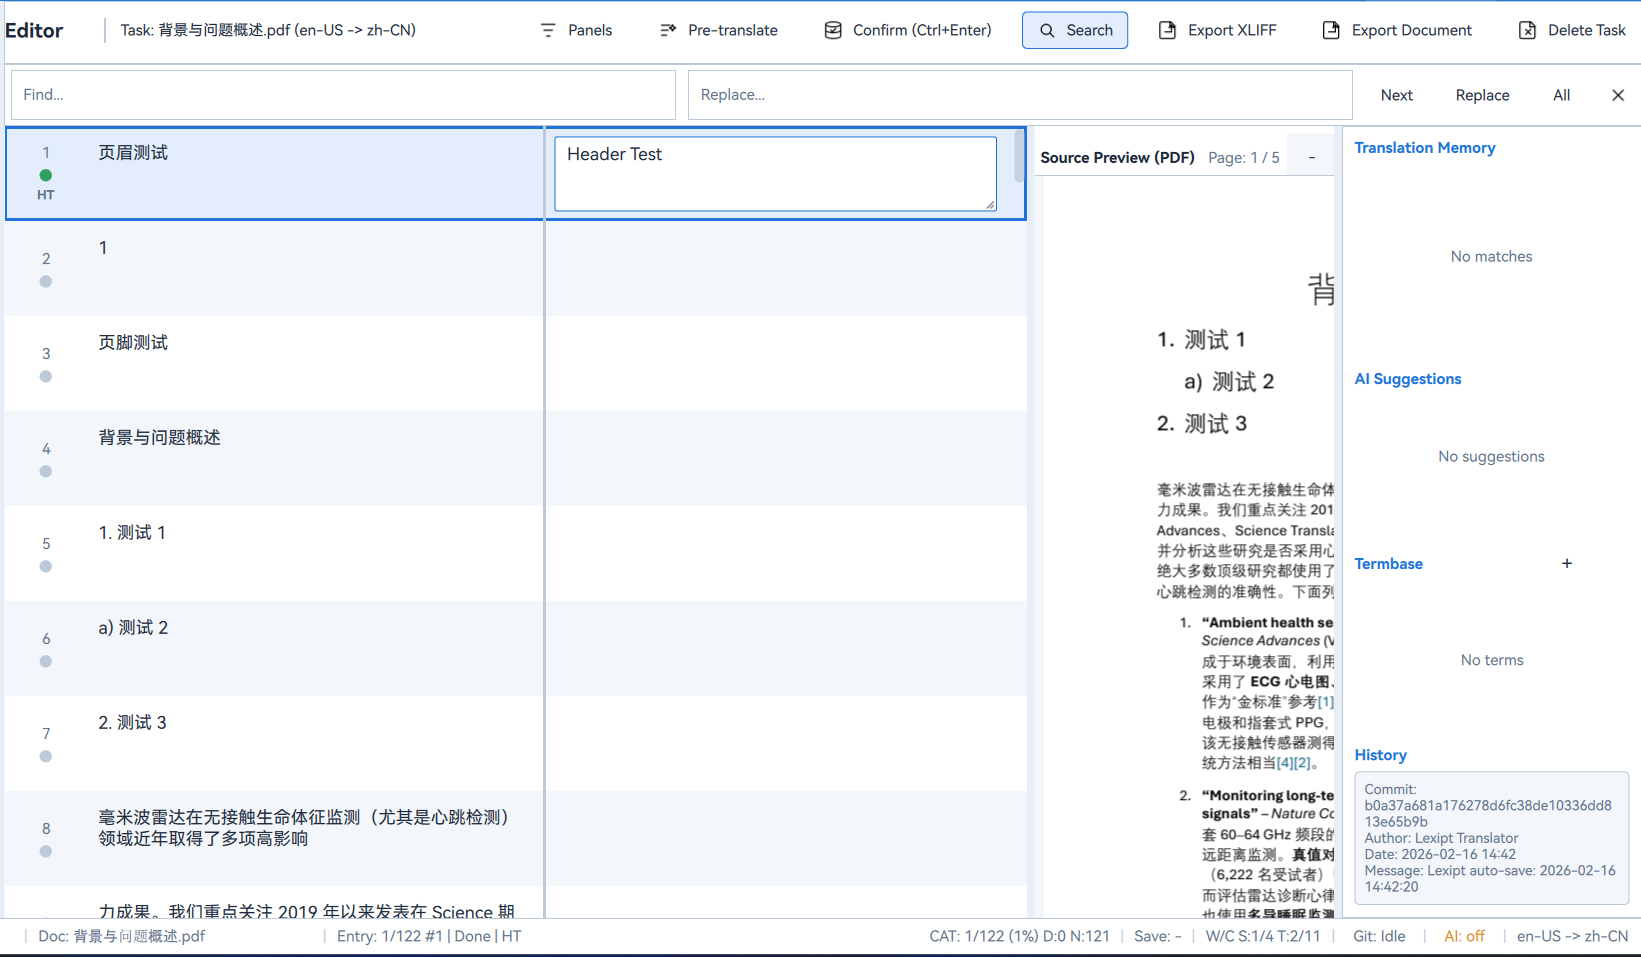
- Find & Replace: Click the
Find...orReplace...button above the editor to open the Find & Replace dialog.- You can search in source or target text.
- Supports case-sensitive searching, whole-word matching, and other advanced options.
- You can find one by one (
Next), replace one by one (Replace), or replace all (All).
Handling Formatting & Tags
When translating formatted documents such as .docx or .html, formatting information like bold, italic, and links appears as Tags in the segments.
- These tags are typically numbered placeholder pairs.
- You must copy these tags to the corresponding positions in your translation in the correct order to ensure the exported document's formatting is preserved.
- You can select tags in the source text, copy with
Ctrl+C, and paste them into the target editor. - If tags in the target are mismatched or missing, the Quality Assurance (QA) feature will typically report errors.
5.3. Using Translation Assistance Tools
The Assistance Panel on the right side of the editor is key to improving translation efficiency and consistency. It contains four main tabs.
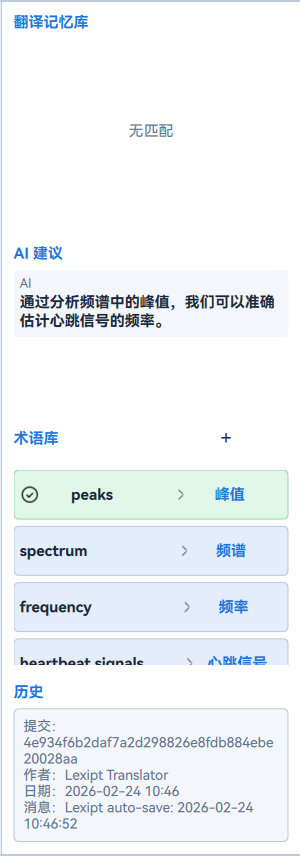
Translation Memory (TM)
TM is a database that stores all your "confirmed" translation pairs (source and target). Its core purpose is to "remember" what you have translated and automatically suggest matches when similar segments appear in the future, avoiding repeated work.
- How It Works: When you activate a new segment, TM automatically searches for similar source text in the database.
- Match Types:
- 100% Match / Context Match: A source text in the database is identical to the current segment, and its context (surrounding sentences) also matches. This is the highest quality match.
- Fuzzy Match: A source text in the database partially matches the current segment, typically shown with a percentage (e.g.,
85%) indicating similarity. Differences are highlighted.
- Apply Match: You can double-click a match in the TM panel to quickly apply its translation to the current target editor, then make minor adjustments.
- TM Updates: Every time you confirm a segment with
Ctrl+Enter, the pair is automatically saved to or updated in the project's.tm/auto.tmtfile. - Import/Export: You can right-click
Translation Memoryin the Project Panel and selectImport TMXorExport TMXto exchange TM data with other translation tools or projects.
Termbase (TB)
TB is a customized dictionary for managing specific terms that need consistent translation within a project, such as product names, brand names, UI labels, etc.
- How It Works: When the source text of the active segment contains a term stored in the Termbase, that term is highlighted and its standard translation appears in the TB panel, reminding you to use consistent translations.
- Adding New Terms:
- In the segment editor, select the term in the source text (e.g.,
Lexipt) and your standard translation in the target editor (e.g., the localized name). - Right-click, or click the
Add New Termbutton on the TB panel. - A simple dialog will appear with the selected source and target terms pre-filled — click
Saveto save.
- In the segment editor, select the term in the source text (e.g.,
- Import/Export: Similar to TM, you can import or export industry-standard
.tbxformat Termbase files through the Project Panel.
AI Suggestions
This feature uses third-party AI services (such as OpenAI, DeepL, etc.) to provide machine translation suggestions for the current segment.
- Prerequisites: You must first configure at least one AI service connection in
Settings > AI Settings. - Getting Suggestions:
- Automatic: Depending on your settings, AI may automatically provide suggestions when you activate a new segment.
- Manual: Right-click a segment and select
✨ Ask AI to Translate.
- Applying Suggestions: AI translation results appear in the AI panel — you can click them to insert into the current target editor. AI translation quality depends on the model you use and typically requires human review and correction.
History
The History panel shows all revision records for the currently selected segment.
- Purpose: Useful when you want to know how a segment's translation evolved, or in team collaboration when you want to see who modified a translation and when.
- Display: Lists each change's timestamp, author, and specific modifications.
5.4. Quality Assurance & Export
After completing all translations, the final steps before delivery are quality checks and file export.
Pre-translation
For large projects, you can use the "Pre-translation" feature to quickly process content that existing resources can cover.
- In the editor toolbar at the top, click the Pre-translate button.
- In the dialog that appears, configure pre-translation rules, such as:
- Fill only with TM results at 100% or higher match.
- Use AI to translate segments without TM matches.
- Set the status of filled segments (e.g., set to "Draft").

After clicking run, the software will batch-process the entire file, significantly saving your time.
Quality Assurance (QA)
QA is a critical step in ensuring translation quality. Lexipt automatically performs checks during your work and before export, flagging potential errors. Rows with a ⚠️ marker in the segment list indicate potential issues.
Common QA checks include:
- Tag Errors: Formatting tags in the target do not match the source (missing, extra, or wrong order).
- Terminology Inconsistency: The translation does not use the specified Termbase translations.
- Number Errors: Numbers in source and target do not match.
- Empty Translation: A segment is marked as "Translated" but the target content is empty.
- Formatting Inconsistency: Punctuation, spacing, etc., are inconsistent between source and target.
Before exporting, make sure all QA warnings have been reviewed and addressed.
Exporting Files
After completing all translations and checks, you can export your work.
Export Final Translation:
- Click the Export Document button in the top toolbar.
- The software will generate a fully formatted final document with all translations based on the source format (e.g.,
.docx). This is the file to deliver to the end client.
Export Bilingual File:
- If you need to hand off work files for review, or open them in other translation tools, you can export in bilingual format.
- Under the XLIFF menu in the top toolbar, select Export XLIFF.
- This generates a
.txlffile — an industry-standard XML file containing source text, target text, segment statuses, and all work information.
6. AI & Copilot Features
Lexipt integrates powerful AI features to further enhance your translation efficiency and experience.
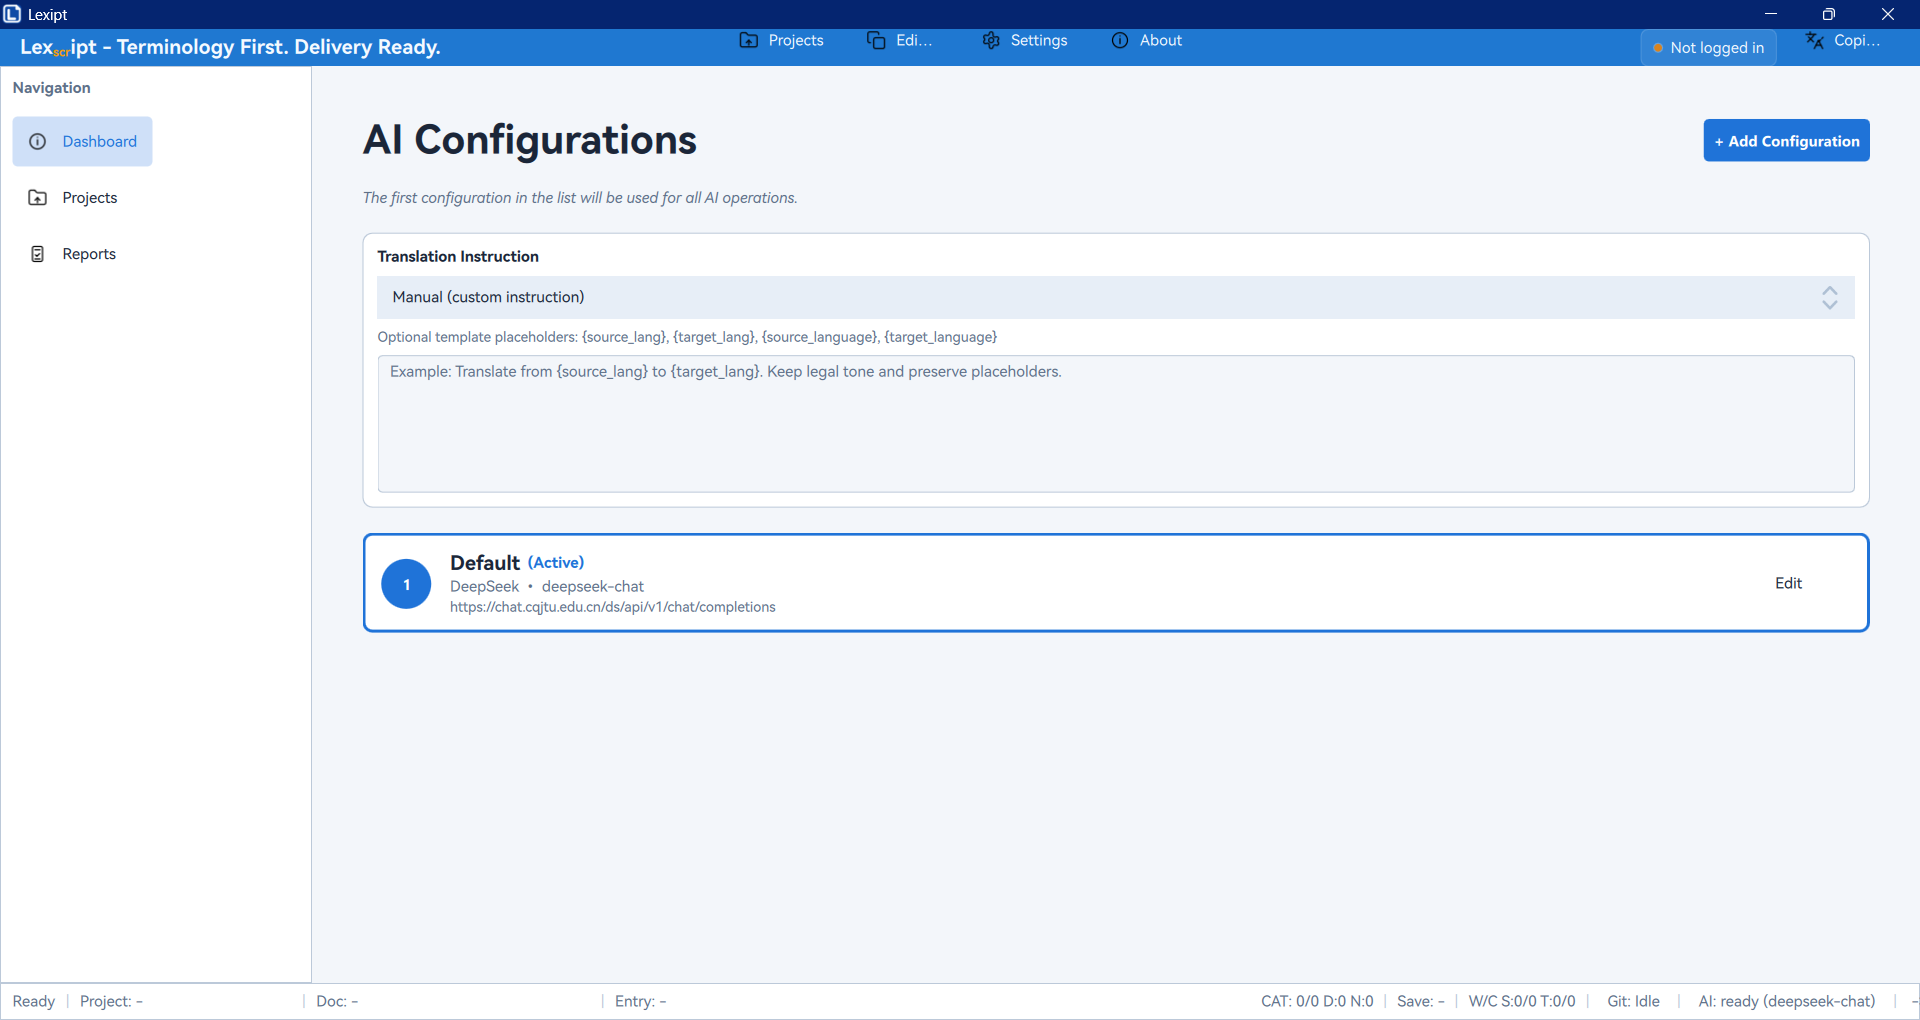
6.1. Configuring AI Services
To use AI suggestion features, you first need to connect to an external AI service.
- Navigate to the Settings page, then select AI Settings.
- Click the + Add Configuration button.
- Fill in your AI service information in the form on the right:
- Configuration Name: A recognizable name for this configuration (e.g.,
My OpenAI). - Full API Endpoint: The full API URL from your AI provider. For OpenAI-compatible services, it typically ends with
/v1/chat/completions. - API Key: Your personal API key. Keep it confidential.
- Model Name: The specific model name you want to use (e.g.,
gpt-4o,gpt-3.5-turbo).
- Configuration Name: A recognizable name for this configuration (e.g.,
- After filling in the details, click Test Connection to verify your configuration is correct.
- Click Save.

You can add multiple AI configurations, but only the first one in the list will be used for AI operations during translation. You can drag and drop to adjust their priority.
6.2. Custom AI Translation Instructions
On the AI Settings page, you can also define a global "Translation Instruction". This is a template that guides the AI on how to translate, producing translations that better meet your requirements.
- You can enter any instruction, such as requiring a specific tone or handling certain content.
- Instructions support placeholders:
{source_lang}(source language name),{target_lang}(target language name). - Example:
Please translate the following content from {source_lang} to {target_lang}. Maintain a professional legal tone and preserve all placeholders as-is.
6.3. Getting AI Suggestions During Translation
After configuring AI services, the AI tab in the Editor's Assistance Panel will be active.
- When you activate a new segment, it may automatically request translations based on your settings.
- You can also right-click a segment and select
✨ Ask AI to Translateto manually request a translation. - AI results are displayed in the AI panel — you can click or use shortcuts to insert them into the target editor.
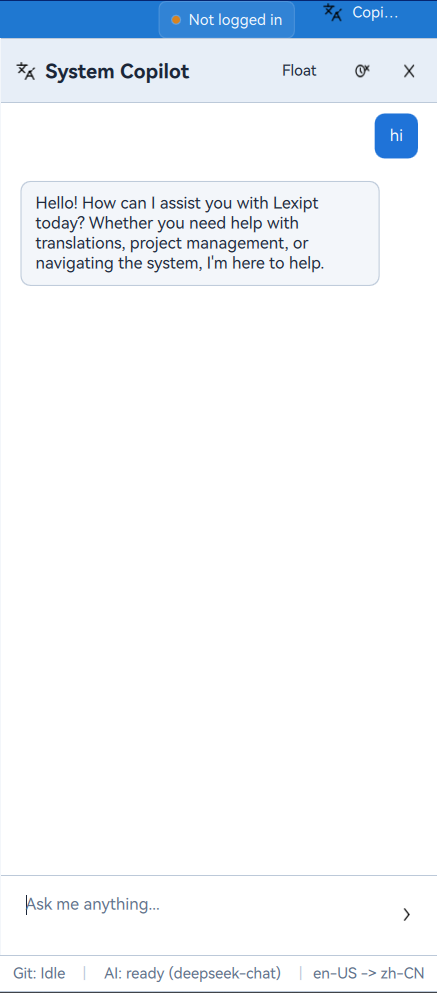
6.4. Using the System Copilot
In addition to translation assistance in the editor, Lexipt also provides a global chat assistant — Copilot.
- Access: Click the 🤖 (System Copilot) icon at the bottom of the main navigation bar to open the Copilot chat panel on the right side of the application.
- Features: This is a general-purpose chatbot. You can ask it any question — look up word usage, request translation polishing, or get background knowledge on a topic.
- Usage: Type your question in the input box at the bottom and send. Chat history is preserved in the panel, and you can click
🗑️ (Clear History)at any time to clear the conversation.
7. Team Collaboration
Lexipt supports team collaboration through a central server (Lexipt Collaboration Server), allowing multiple users to work on the same project simultaneously.
7.1. Collaboration Overview
Collaboration mode uses a client/server architecture. The project manager publishes a project to the server, and translation team members clone the project to their local machines. When any member confirms a segment or makes changes, those changes are sent to the server as "patches", and the server distributes these updates to all other online team members. This keeps everyone's progress synchronized in near real-time.
7.2. Configuration & Login
All collaboration features require connecting to and logging into the collaboration server first.
- Ensure you have received the server address, your username, and password from the project administrator.
- In the Lexipt client, navigate to the Settings page, then select the Collaboration sub-page.
- Fill in the server information and log in.
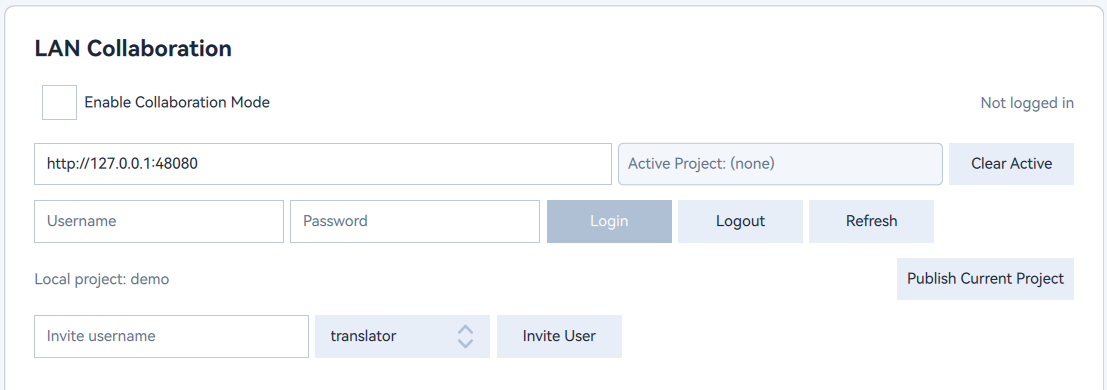
After a successful login, your username and role will be displayed on this page, and collaboration-related menus and buttons will be activated.
7.3. Project Manager Workflow
Project managers are typically responsible for creating, distributing, and managing collaborative projects.
Publishing a Project to the Server
- First, create a complete project locally following the standard process and import all source files that need translation.
- Open the local project, and in the Editor view, click the Publish to Server button in the top toolbar (this button is only visible after logging in).
- Confirm the project information in the dialog that appears, then click Publish.

The software will upload the entire project (including source files, settings, TM, and TB) to the server. After a successful upload, the project transforms from a local project to a collaborative project.
Managing Team Members
After publishing a project, the project manager can invite and manage members through the web-based admin dashboard or the in-client management interface (if available).
- Invite Members: Add team member accounts to the project.
- Assign Roles: Assign appropriate roles to each member (e.g.,
TranslatororReviewer). - Review Requests: If uninvited users attempt to join the project, the project manager will receive a notification and can approve or deny the request.
7.4. Translator Workflow
As a member of the translation team, your primary tasks are connecting to the server, obtaining the project, and starting translation.
Joining & Cloning a Project
- First, ensure you have successfully logged in via the Collaboration settings.
- Navigate to the Projects page. In addition to local projects, you will see a Server Projects tab.
- Switch to that tab — you will see a list of all server projects you are authorized to access.
- Find the project you need to work on and click the Clone button.
- Choose a local folder to store your copy of the collaborative project.
After cloning, the project will appear in your "Recent Projects" list with a cloud icon indicating it is a collaborative project.
Synchronizing Work
After opening a collaborative project, your workflow is essentially the same as translating a local project, but all actions are synchronized with the server.
- Auto Upload: When you confirm a segment (
Ctrl+Enter), the translation pair is not only saved to your local TM but also sent to the server as a "patch". - Auto Receive: When other team members confirm new segments, the server pushes their updates to you. You may see other segments' translations and statuses change automatically.
- Status Indicator: The status bar in the lower-right corner of the interface shows your server connection status, such as "Connected", "Syncing", or "Offline".
Through this mechanism, the entire team's progress stays consistent, greatly reducing the hassle and risks associated with manually merging files.
8. Conclusion
Congratulations on completing your Lexipt learning journey!
Through this manual, you have learned how to install and configure Lexipt, mastered the complete workflow from creating projects, translating and editing, leveraging Translation Memory and Termbase, to final delivery. Additionally, you have explored the powerful AI Copilot features and efficient team collaboration mode.
We encourage you to explore the Settings page in depth, customizing the software to your personal preferences and project needs to create the most efficient translation environment.
If you encounter any issues or have valuable suggestions during use, please visit our community website and submit an Issue. Your feedback drives our continuous improvement. Happy translating!